Showing posts with label sweet. Show all posts

Sunday, 7 December 2014

Citrus Snowballs

Here is another sweet recipe for cold, winter evenings at home. These snowballs are surprisingly tasty, sweet, orange, crunchy cookies which will be a good match for hot tea/cocoa, blanket aaand book or dreams ;)
Also, if you're running out of time, they're very easy and quick to make which gives them another big +. 
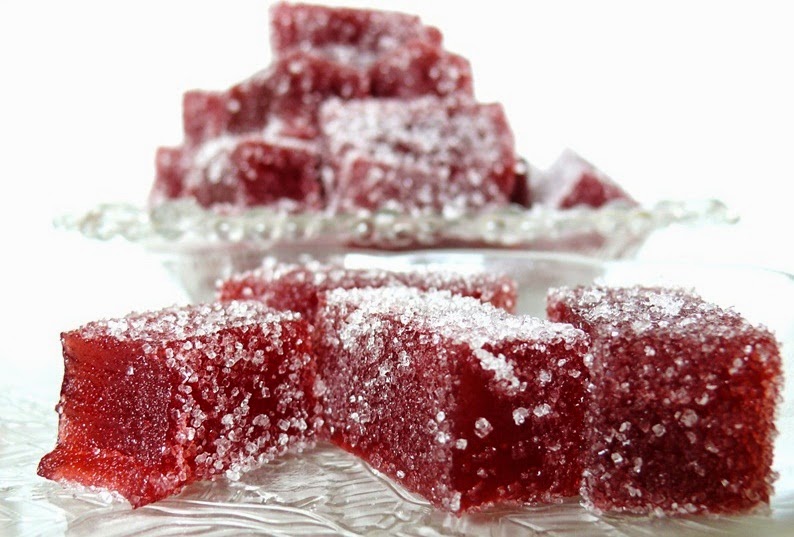
Sprinkled with powdered sugar or glucose, look like a snowball on a table :) And children will love them! Just make sure they're not using them as snowballs ;)
There original recipe is here, though I've made quite a lot of changes, such as replacing butter with margarine which I tend to do very often recently.


Ingredients:

  • 250g of margarine
  • 100g of powdered sugar (+ more to sprinkle the cookies)
  • 1 teaspoon of orange extract
  • 100g of chopped walnuts
  • 100g of candied orange skin
  • 375g of flour

Preparation:
  1. Prepare a baking tray and put baking paper all over it.
  2. Start preheating the oven to 180C.
  3. Take a mixer and its bowl. Put margarine and powdered sugar inside and beat till bright and fluffy (around 10 minutes).
  4. Add orange extract, walnuts, candied orange skin and mix till well combined.
  5. Add flour and mix (or knead) again till well combined.
  6. Start making balls (around 2 teaspoons of dough for 1 ball) and place on previously prepared baking tray (they might be placed close to each other as they won't grow).
  7. If the oven is ready, bake for 10-15 minutes till golden brown.
  8. Cool down on a wire rack.
  9. Sprinkle with powdered sugar.
  10. Bon Appetit!

Friday, 28 November 2014

Bajadera Reindeers

Bajadera is always a fantastic, last second idea which always works and always tastes delicious :)
I do recommend them, especially when you have no time and your oven is tired ;) it doesn't require baking ;) I do apologize for the bad quality of the picture, so let me say that the taste and children's smiles will make it up to You :)
Another wonderful use of bajadera, a little bit easier than reindeers, but also Christmas-themed You can find here.
Quite changed recipe comes from this website.


Ingredients:

Base:
  • 400g of dried pound cake (preferably lemon or vanilla flavoured)
  • 120g of mascarpone cheese
  • 80g of nutella
  • 350g of milk chocolate
  • favourite mincemeat (including for example nuts, almonds; or baking cocoa)
Reindeers:
body parts:
  • nose: 1 pack of red small round sprinkles, 
  • horns: 1 pack of pretzels, cut into halves, 
  • eyes: frosting deco pens
  • some small plastic sticks
  • ribbons for decoration


Optional ingredients:
  • 10-25ml of Rum
  • dried fruit - but in very small pieces

Preparation:
  1. If your pound cake isn't dried enough, it is a good idea to crumble it into very small pieces and put it in the preheated oven(over 180C) for a couple of minutes.
  2. Take a mixer and it's bowl. Put mascarpone cheese and nutella inside. Mix till smooth.
  3. Put dried pound cake to the bowl and mix everything till smooth. 
  4. Here is the time to add and mix optional ingredients if desired.
  5. Cover with foil and cool down in the freezer for 45 minutes.
  6. During that time, prepare a rectangular bakewell pan or loaf tin or - something that you can put in your freezer. Put some baking paper on its bottom (if You have a sponge suitable for making cake pops - use it here).
  7. Take the dough out from the freezer and start making small balls, put each of them in previously prepared pan/tin.
  8. Put back in the freezer for another 15 minutes.
  9. During that time, take a pot, put chocolate (in small pieces) inside and melt on a very low heat.
  10. Dip 1/3-1/2 of every stick in the melted chocolate and put in the middle of every ball.
  11. Put it back in the freezer for another 20-30 minutes.
  12. Prepare a sponge (to dig reindeers in it) and elements of decoration around you.
  13. Take one ball from the freezer, dip in the chocolate, so that it covers the entire ball, take out, wait till the excess of chocolate falls down.
  14. As the ball is very cold, the chocolate will stiffen on it very fast, so as soon as you take it out from the pot, decorate it, starting with horns and dig it in the sponge.
  15. Repeat with all the balls.
  16. At the end, decorate with ribbons.
  17. Store them in the fridge.
  18. Bon Appetit! ;)

Thursday, 27 November 2014

Walnut Circles

These are very nice, crunchy cookies, which might be prepared in any shape desired, if only You have a cookie cutter :) Margarine gives all of the bakery that characteristic, outrageous taste that makes you want another cookie :) I think they're wonderful for kids, especially when cut in a nice, (now) Christmas-theme shape :) Of course it is possible to decorate it with icing sugar, making Snowmen, Santas, Reindeers and other wonders (yes, yes, pinterest appears to be very helpful here ;) ), if only You have enough time and stomachs enjoying very sweet cookies.
Slightly changed recipe comes from this website.


Ingredients:
  • 150g margarine
  • 75g of powdered sugar
  • 230g of flour
  • 1 egg yolk
  • a pinch of salt
  • 1 teaspoon of vanilla or orange extract
  • 75g of walnuts, chopped
  • 75g of candied orange skin


Preparation:
  1. Take a big bowl, put margarine, powdered sugar, flour, egg yolk, salt and extract inside and knead.
  2. Add walnuts and orage skin.
  3. Prepare a baking pan, cover with bakig paper.
  4. Start preheating the oven to 200C.
Here - two methods:
  1. For circles - divide the dough into 2-3 pieces and make cylinders (the diameter of the cylinder is the diameter of the cookie), put in the freezer till it completely freezes. 
  2. When ready, cut into slices, around 0,5-1 cm thick. The dough won't grow, so the cookie will look absolutely the same.
  3. For cookie cutter shapes: put in the freezer till it is really hard but not completely frozen.
  4. Take the rolling pin and roll out the dough to 0,5-1cm thick (use a little flour if neccesary). 
  5. Cut the shapes.
  6. Put the cookies on a baking pan, bake for 10 minutes in 200C.
  7. Cool down, decorate with icing sugar if desired.
  8. Bon appetit! :)

Friday, 21 November 2014

Winter Snowballs

Winter is coming, snow is slowly falling down from the sky and what's more important Christmas is coming as well, so here is another sweet recipe for cold winter evenings at home. These are surprisingly tasty, sweet, cinnamon crunchy cookies which will be a good match for hot tea, cocoa and blanket ;) Another huge advantage - if you're running out of time, these are very easy cookies and quick to make. Sprinkled with powdered sugar or glucose, look like a snowball on a table :)
There original recipe is here, though I've made quite a lot of changes, such as replacing butter with margarine which I tend to do very often recently.


Ingredients:

  • 250g of margarine
  • 100g of powdered sugar (+ more to sprinkle the cookies)
  • 1 teaspoon of vanilla extract
  • 1,5 teaspoon of cinnamon
  • 100g of chopped walnuts
  • 100g of candied orange skin
  • 375g of flour

Preparation:
  1. Prepare a baking tray and put baking paper all over it.
  2. Start preheating the oven to 180C.
  3. Take a mixer and its bowl. Put margarine and powdered sugar inside and beat till bright and fluffy (around 10 minutes).
  4. Add vanilla extract, walnuts, cinnamon, candied orange skin and mix till well combined.
  5. Add flour and mix (or knead) again till well combined.
  6. Start making balls (around 2 teaspoons of dough for 1 ball) and place on previously prepared baking tray (they might be placed close to each other as they won't grow).
  7. If the oven is ready, bake for 10-15 minutes till golden brown.
  8. Cool down on a wire rack.
  9. Sprinkle with powdered sugar.
  10. Bon Appetit!

Sunday, 17 August 2014

Raspberry Buns

Absolutely stunning! Best buns I've ever eaten! Soft, moist, sweet raspberries plus mascarpone cheese make a wonderful couple if it comes to the taste and the overall effect is outrageous :) Perfect for breakfast, lunch, either at home or at work/school. A definite must-bake :) A big thanks to Deliciouslyyum for the recipe!
If You need a converter, feel free to use this one.


Ingredients:


Dough:

  • 1 cup of milk
  • 4 tablespoons of butter, cut into small pieces
  • 3 1/4 – 3 1/2 cups of flour, divided
  • 1 package of instant yeast (about 2 1/4 teaspoons)
  • 1/4 cup of white sugar
  • 1/2 teaspoon of salt
  • 1 egg

Filling:

  • 8 oz. of mascarpone cheese, at room temperature
  • 5 tablespoons of granulated sugar, divided
  • 1 teaspoon of vanilla extract
  • 12 oz. of raspberries (if frozen, need to be defrost and dried on a paper towel)
  • 1 tablespoon of cornstarch
  • zest of 1 lemon

Icing:
  • 1 and 1/2 cups of confectioners’ sugar
  • 2 tablespoons of melted butter
  • 1/2 teaspoon of vanilla
  • 1-2 tablespoons of milk


Preparation:


Dough:

  1. Take a baking tray, grease and put baking paper all over it. Set aside.
  2. Take a bowl (suitable to put in a microwave or on the stove), put milk and butter inside and heat till the butter is almost melted and the milk is warm. Stir till the butter is completely melted. Set aside. 
  3. Take a big bowl (you can do it using a stand mixer if it is suitable to knead the dough), put 2 cups of flour, yeast, sugar, and salt inside. Stir, so that it mixes.
  4. Add the egg and milk to the dry mix and continue stirring until thoroughly combined. Start kneading for at least few minutes (till the douhg starts pulling away from the sides) and add remaining flour. 
  5. Knead the dough for another 5 minutes. 
  6. Cover the bowl with dough with a dry, clean cloth and put in a warm place (do not leave it near an open window, even if it is hot outside). Leave it for at least 10 minutes or until it doubles its size.
  7. During that time, prepare the filling.

Filling&Dough:

  1. Take a bowl, put mascarpone cheese, 3 tablespoons of sugar and vanilla extract inside. Set aside.
  2. Take another bowl, put frozen raspberries, remaining 2 tablespoons of sugar and cornstarch inside, mix. Set aside as well.
  1. When the dough is ready, sprinkle kitchen's surface with flour and roll it out until you get a 12 x 14 inches rectangle. 
  2. Distribute mascarpone cheese mixture evenly over the dough. Put raspberry mixture on top and sprinkle with lemon zest. 
  3. Now, time to roll the dough up - starting with one of the longer's side, roll the dough into a log. Close the sides very precisely so that the filling doesn't come out. 
  4. Cut into slices (around 2-3 cm thick) and put them on previously prepared baking tray, leaving some space between them (the buns will rise again). Cover again with a clean kitchen cloth. Set aside in a warm place for at least 30 minutes (or till it doubles its size again). 
  5. During that time, start preheating the oven to 180C. 
  6. Bake the buns for around 20 minutes (or until the tops are golden brown).
  7. Now, it is a good time, to prepare the icing.
Icing:
  1. Mix confectioners’ sugar, butter, vanilla and milk. 
  2. When the buns are ready, take them out from the oven, let them cool down for a while and distribute the icing all over their tops.
  3. Keep closed for max 3 days or store closed in the freezer for maximum 3 weeks.
  4. Bon Appetit! ;)

Thursday, 7 August 2014

Snickers Cheesecake

When I was little, we had a small shop nearby, where you could have bought a delicious cheesecake called 'snickers'. We used to buy it every weekend and devour it very quickly :) But the shop was closed and the cheesecake disappeared. We couldn't have found it anywhere (well, definitely not same tasty). Now, a good few years later I thought that it would be wonderful to prepare it on my own, especially that I have some snickers fans here. And so I did prepare it, with a little help of KwestiaSmaku.
It is definitely worth trying! I do recommend. Half of it disappeared during the first hour of its existence, hihi :) 


Note:
  • This cheesecake needs to be prepared a day earlier as it needs to stiffen in the fridge.
  • Some ingredients must be in a room temperature.
  • It is good to buy unsalted peanuts - You can control how salty Your cheesecake will be.


Ingredients:

Bottom:
  • 350-400g of cocoa biscuits 
  • 50-100g of melted margarine or butter
  • 2 tablespoons of baking cocoa

Cheesecake (all the ingredients need to be in a room temperature):
  • 1kg of cheesecake
  • 150-200 g of sugar
  • 3 tablespoons of potato flour or powdered vanilla custard (budyn)
  • 5 eggs
  • 125ml 36% cream
  • 3 teaspoons of vanilla extract

Top:
  • 2 tins of fudge
  • 350g of peanuts (unsalted)
  • some salt (3-5 pinches)
  • optionally - few snickers bars cut into small pieces

Preparation:

Bottom:

  1. Crush the biscuits into very small pieces, for example using a blender's cube cutter (biscuits might be crushed into 'sand').
  2. Add cocoa, stir, add melted butter, stir again, precisely. You can check with a spoon or a hand if the biscuits are sticky enough, it can't be dry and powdery.
  3. Take a baking pan, put baking paper all over it, add biscuits, distribute all over the pan and knead with a hand or a tumbler.
Cheesecake:
  1. Start preheating the oven to 175C.
  2. Remember that all the cheesecake ingredients need to be in a room temperature.
  3. Take a mixer and its bowl, put cheese, sugar and flour inside, mix on a low/middle rotation only till the mixture gets smooth (not longer than 2 minutes).
  4. Add eggs, one after another, mixing after each of them for a few seconds.
  5. Add 36% cream and vanilla extract and mix on a low rotation only till it links.
  6. Pour the mixture into previously prepared rectangular pan with biscuits bottom.
  7. Put in the oven and bake for 15 minutes in 175C. After that time, decrease the temperature to 120C and bake for another 1 hour and 30 minutes, till the cheesecake stiffens (it might still be a little jelly-like in the middle, it is okay, it will stiffen in the fridge).
  8. After that time, turn off the oven and cool down the cheesecake in a slightly opened oven.
  9. When cooled down completely, put in the fridge for a few hours (most preferably - for the entire night).
Top:
  1. Take a non-stick pot, pour both tins of fudge inside, turn on a low heat. Stir, adding peanuts. 
  2. Add salt - one pinch, taste, another - as much as you prefer. Note that after a while the taste will slightly change as the salt will completely dissolve and mix with fudge, changing its taste.
  3. Turn off the heat. 
  4. Cool the mixture down a little bit, stiring all the time.
  5. Take the cake out of the fridge, distribute the fudge with peanuts all over the cake.
  6. Store in the fridge.
  7. Bon Appetit :)

Sunday, 13 July 2014

Fruit Jellies

Very tasty, fruity, healthy, natural jellies, possible to be prepared from many different fruit, especially, if you have no idea, what to do with them or when they are...way too ripe ;) 
Lack of artificial substances is undoubtedly their biggest advantage.
They might be sprinkled with sugar (though I prefer sugar-free jellies :) ). It is a quick, light and delicious form of confectionery. My little naphew's face and hands are all in strawberry jelly now, so I guess they're tasty, hi hi ;)
Recipe comes from this website.


Ingredients:
  • 30 g of gelatin
  • 1 glass of water
  • 1-2 glasses of sugar (it depends how sweet you want your fruit puree to be)
  • 1 teaspoon of lemon juice
  • 500-600 g of fruit (either frozen or fresh - preferably: strawberries, raspberries, blueberries, currants, cherries)*

* I mixed blueberries with strawberries, which is why they are so dark.


Optional ingredients:
  • sugar or powdered sugar - to sprinkle the jellies

Preparation:
  1. Take a bigger, clean pot and put the fruit inside. Boil for 15 minutes. Grate through the sieve, to seperate puree and kernels. 
  2. Take only 3/4 glass of the mousse** to prepare jellies. Put the glass with mousse aside.
  3. Take another pot, put gelatin inside and pour the water. Wait for 4 minutes. Heat, till all the gelatin melts (stir). Add 1-2 glasses of sugar, boil and  stir till the sugar melts. Add lemon juice. 
  4. Boil for around 10 minutes on a very low heat. Turn off the heat and leave the mixture for 5 minutes. Take away the foam if any appears.
  5. Mix with fruit mousse.
  6. Take a flat form, cover with cling film or foil. Pour the mixture inside. Put it in the fridge for around 12 hours, or till the jelly stiffens.
  7. After that time, take it out of the form and cut it in any shape you like - you can use only a knife to make small squares or cookie cutters to make shapes.
  8. Sprinkle with sugar/powdered sugar - preferably only those you want to eat now.
  9. Jellies can remain (in a closed box) in the fridge for max. 2 weeks. 
  10. Bon appetit! :)

Friday, 11 July 2014

Meringue Cookies

Mmm! Very nice and elegant cookies! Equally sweet and sour. Though if You don't like the sour taste of lemon, the filling may be different, as a lot of fillings match here :) 
And - If You're running out of time, there is no need to bake a home-made meringues, as they're available in most supermarkets.
Those cookies - smaller or bigger - will wonderfully decorate the table. 
I think a pyramid of sweet meringues on a big white plate, on a wedding table would look just purely perfect .. don't You think? :)
Recipe for meringues, slightly changed, comes from that website.


Ingredients:

Meringue:

  • 3 egg whites 
  • 200g of sugar (finely ground)
  • a pinch of salt
Lemon curd:
  • 3 eggs 
  • lemon zest and lemon juice from 3 lemons 
  • 100g of powdered sugar 
  • 100g of cool butter 
Additional ingredients:

  • food colouring (powdered or gel)

Preparation:

Meringue:

  1. Prepare a baking sheet, cover with baking paper.  Draw a lot of small circles all over the baking sheet, leaving some space between those circles (diameter: max 5 cm). Put aside. 
  2. Take a mixer and its bowl, put egg whites and salt inside, start beating. After a while, start adding sugar, one tablespoon after another, mixing precisely all the time. The beating should take 10-15 minutes, not less. The meringue after the beating should be stiff and shiny and sugar should dissolve completely. 
  3. Here is a good time to add food colouring, as much as you wish, and mixing precisely. Note that the colour will fade a little bit due to the baking process, so add a little bit more of it, not to be dissapointed with the final colour of the cookies.
  4. Using a syringe, distribute the meringue on the baking sheet, on previously drawn circles. 
  5. Put in the oven and bake for 60-90 minutes (or a little bit longer) in 120C. After that time, meringue cookies should be crunchy. 
  6. After baking, keep in a room temperature, till the filling is ready.

Lemon curd:

Lemon curd requires a 'bath' so it is necessary to have a suitable pot and a bowl, that can be put one on another.

  1. Chop the butter into smaller pieces. 
  2. Take a pot, put some water inside, start boiling it. 
  3. Take a bowl that matches the pot, put eggs inside, beat. 
  4. Add lemon juice, lemon zest, powdered sugar and stir till everything links and there are no lumps. 
  5. Now put the bowl on the top of your pot (make sure the bowl stands out from the pot so that you don't get burn) and slowly keep heating up the mixture (don't boil it). 
  6. Keep adding the butter, one piece after another, stiring after adding. 
  7. When all the butter is melted in the mixture, turn off the heat and put the bowl with lemon curd somewhere aside, to let it cool down. 
  8. Then put your lemon curd in the fridge so that it stiffens more. 

Finishing:
  1. Take a meringue, distribute some filling on its bottom and link with another small meringue cookie.
  2. Bon Appetit! :)

Wednesday, 2 July 2014

Strawberry Yoghurt Cake

I was looking for a nice strawberry cake recipe. But not the strawberry cake I’ve already made, ahh, I craved for something new, as I’m addicted to trying new recipes. And I found this strawberry yoghurt cake. One word: Wow! That’s the quickest and the one of the cheapest cake I’ve ever made! And I needed to bake 2 pans, one after another, day after day, cause it disappeared so quickly! I’m utterly shocked! And how many variations this one particular cake has, that’s unbelievable! Delicate, spongy, sweet, perfect for a morning coffee and for a nice lunch at work ;-) What’s more, that’s one of the ‘light’ cakes, so we can feel excused for eating half of the baking pan ;) (giggle) 
I do recommend!
The only thing that I found particularly difficult to explain to You is a polish dessert - powdered, quick, jelly-like, fruit-flavoured 'kisiel'. I can't find an equivalent for it in English. I do encourage You to look up for it. Wikipedia defines it as 'kissel' and explains a little bit what it is. If You are unable to buy it, You can easily use jam ;)
I made quite a lot of changes, though still - big thanks for KwestiaSmaku for the recipe!

Ingredients:

1 glass = 250ml
  • 2 big eggs
  • 1 glass of greek yoghurt
  • 2 glasses of flour
  • 2 teaspoons of baking powder
  • 500g of strawberries
  • ¾ -1 glass of sugar
  • 2 tablespoons of vanilla sugar
  • 25g of melted butter (or 25g of oil)
  • 1 powdered strawberry kissel
  • 2-3 tablespoons of strawberry jam


Optional ingredients:
  • Powdered sugar
  • X g of any other berries ;) (I had one bowl of currants from my garden, so I used them J)
  • Icing sugar


Preparation:
  1. Bring eggs and yoghurt to room temperature.
  2. Prepare 3 bowls. Mix flour with baking powder very precisely and sieve to the 1st bowl. Put aside.
  3. Wash your fruit. Take 500g of strawberries, cut out the leaves, divide into halves (250g each), put in remaining 2 bowls. Cut the strawberries into halves (if the strawberry is really big – 3 pieces)
  4. Take a mixer’s bowl. Put sugar and vanilla sugar inside.
  5. Melt the butter in a small pot.
  6. Take a rectangular baking pan (preferably 20x30 cm, might be a little bit bigger), grease it precisely with soft butter. Put aside.
  7. Start preheating the oven to 165C.
  8. Prepare the kissel as the recipe on the packaging says. Mix with jam. Mix 1/3 of this kissel-jam mixture with one strawberry bowl. Put aside.
  9. Add eggs to the mixer’s bowl with sugars.
  10. Using a mixer, start beating for 7 minutes. After that time, put the mixer aside, add yoghurt, melted butter, sieved flour with baking powder and slowly, precisely, for a short time, stir, using a big spoon or spatula, only till all the ingredients link, not longer.
  11. Put the dough in previously prepared greased baking pan, distribute the dough all over the pan.
  12. Take a bowl with kissel strawberries. Here – preferably – don’t use much of the kissel as it may destroy the cake, it is perfectly enough if there is some kissel on the strawberry. Put the strawberries all over the cake, leaving some space between them (chequered pattern works and looks perfectly).
  13. When done, put it in the oven and bake for 20 minutes. Observe your cake, it might take less or more time for Your cake to be ready, as every oven works differently – You are probably the person who knows it best.
  14. After those 20 minutes, if the top is gold, use a toothpick to check, if it is ready inside. If not – cover the top with foil and bake for another 10 minutes or so.*
  15. Cool down, take out from the pan. Take the second bowl with strawberries and kissel, fill the holes in the cake - firstly with some kissel, then with a strawberry.
  16. Sprinkle the cake with (for instance) remaining fruit (or any other additional fruit if You have prepared them), powdered sugar, icing sugar or add remaining kissel all over the cake.
  17. Bon Appetit! ;)


*the cake should be much bigger, its sides should stick out from the pan, the top should be gold and a toothpick clean (if there is any cake glued to a toothpick, it is not ready yet)


Sunday, 15 June 2014

Puff pastry cookies with strawberries and Nutella

Are unexpected guests coming soon? Don't you have a clue what to put on the table? Are you organizing a party where sophisticated cakes aren't a suitable match? This is an easy, quick, and overtasty solution :) I do strongly recommend :) They're outrageous!
The recipe comes from this website, as usually, I changed a tiny little bit :)

Ingredients:
  • 1 packing of good quality ready made puff pastry
  • 1/2 jar of Nutella (or something very similar in taste to Nutella)
  • 100 g of strawberries
  • powdered sugar
Optional ingredients:
  • chopped pistachios (to sprinkle the top)

Preparation:

  1. If your puff pastry is totally frozen - defrost it. It needs to be in a room temperature (so that it won't shrink during baking).
  2. Take your puff pastry and using a shape cutter (in every shape you want, it doesn't need to be a heart shape) make as many shapes as you can from your puff pastry. Roll the leftovers of the puffpastry and use it as well. If the puff pastry is too sticky - use some flour (sprinkle it on the puff pastry and rolling pin)
  3. Put the cutouts on a baking sheet (remember to put the baking paper on your baking sheet)
  4. Put in the middle of every cutout 1 teaspoon of Nutella
  5. Take the strawberries and - optionally - cut them into halves.
  6. Put the strawberries on Nutella.
  7. Bake in 200 C for 15-17 minutes (may be ready faster - keep an eye on them - if the colour is gold - it is ready). Cool down.
  8. Add some powdered sugar on the top.
  9. Bon Appetit ! :)

Saturday, 14 June 2014

Rafaello

Finally! :) After few considerations and reading many descriptions about this cake, I finally decided to prepare it :) Prepare - not bake, because it is a non-baking cake! ;) (and I really, really love such cakes - time&energy saving ;) ). I prepared it, mixing all the ideas for this cake I found on the Internet. I must honestly admit that all the people who tried it enjoyed it a lot. To my great surprise, among many (from my point of view) better cakes, this Rafaello was the one that disappeared first. 
And - this is another cake, after greatest-of-them-all Gourmet Sensation and it's brother Gourmet Sensation vol 2. which really gets better with time! (second day, amazing!) 
I do recommend! Easy, not expensive, wonderful cake, both in its appearance and taste :)
Though, surprisingly, this cake might be even better - try the second version of Rafaello here.

Ingredients: (for a small rectangular pan, otherwise there's not enough cream, but You can double the ingredients and make double cream, then You'll also need more crackers)

  • 1 litre of 3,2% milk
  • 2 vanilla powdered custards, 40g each (or double the recipe for this budyń, recipe here ;) )
  • 2 tablespoons of potato starch
  • 3/4 glass of sugar
  • 2-3 vanilla sugars (16g each)
  • 1 teaspoon of vanilla extract
  • 1 egg yolk
  • 250g of butter
  • 200g of shredded coconut (150g for the cream, 50g to sprinkle the top)
  • 2-3(3-5 if bigger pan) packs of crackers (rectangular shape)

Optional ingredients:
  • almond flakes, for sprinkling the top
  • 1/2 glass of vodka or 
  • 1/2-3/4 glass of advocaat (if You wish to add any alcohol, I would recommend this one)

Preparation of budyn/custard:

For those of You, who has powdered custard, follow the steps below, if You can't buy powdered budyn/custard then follow all the steps in that recipe, just remember to double all the ingredients.

  1. Take a glass, fill 3/4 of it with milk. Add powdered custard and potato starch. Stir till smooth (no clumps please!)
  2. Take a pot, put all the remaining milk in there, add sugar, start boiling. Stir from time to time to help the sugar dissolve. Bring to boil and add the mixture from the glass. Lower the heat, stir energetically till it turns thick. Cool down.
Now, when the custard is ready: 
  1. Using a stand mixer, mix butter with egg yolk, adding cooled down custard, one tablespoon after another.
  2. Here is a good time to add alcohol and mix.
  3. Add shredded coconut (leave around 50g for sprinkling the top), mix till it links.
  4. Take a rectangular pan - preferably a rectangular springform pan (no baking paper inside is necessary, in both cases).
  5. Put one layer of crackers and start adding some part of the cream, to cover the entire crackers layer (yes, I realize how hard it is to distribute the cream, You can use many techniques to make it easier - for example: put some lumps and try to link them or distribute the cream through syringe and then smooth it with a spoon)
  6. Put another layer of crackers and cream - repeat till all the ingredients are used, the last layer is cream.
  7. Sprinkle the top with shredded coconut or/and almond flakes.
  8. Cover the cake with foil, put in the frigde for at least 3 hours.
  9. Bon Appetit! ;)

Wednesday, 21 May 2014

Banana Pancakes


Fantastic! I finally managed to prepare them ;) With an irreplaceable help of Nigella's 'Feast' Book :)
I do recommend them, they're outrageous!
I slightly changed the original recipe as I personally prefer them without a banana.


Ingredients:
  • 150g of flour
  • 1 teaspoon baking powder
  • 1/2 teaspoon baking soda
  • 30g butter
  • 1 egg
  • 250ml of buttermilk*
  • 1 teaspoon caster sugar

Optional ingredients:
  • 1 banana

Additionals:
  • maple syrup (I honestly do recommend it)
  • honey
  • more bananas
  • shredded coconut
  • jam
  • etc ;)

* buttermilk makes pancakes springy, but I realize that it is fat, so you can easily add milk, 1,5-3,2% but then it is very important to add 1/2 teaspoon of vinegar


Preparation:

  1. Take a bowl in which you can mix ingredients (preferably a bowl suitable for using a mixer or blender).
  2. Melt the butter and put it aside to let it cool down.
  3. Optionally - Wash and peel the banana, chop, put in the bowl and mix till smooth.
  4. If you're using milk - put it in another bowl, add vinegar and leave for 5 minutes. After that time add all the ingredients (without butter, unless it is already cold) and mix, till smooth.
  5. If you're using a buttermilk - add all the ingredients except for melted butter in a bowl. Mix to receive smooth mixture.
  6. When the butter is cooled down, add it and whisk again, till smooth.
  7. Take a frying pan, put some oil on it and distribute the oil using a paper towel (yes, pancakes aren't supposed to swim in that oil ;) the frying pan just needs to be greased).
  8. Turn on the lowest heat. Wait a minute.
  9. Put some dough on the frying pan, fry for a minute or two, till the colour is gold (keep paying attention to your pancake, they fry really fast), overturn.
  10. Take it off from the frying pan, add your favourite additional ingredients. 
  11. Bon Appetit! ;)

Tuesday, 20 May 2014

Tropical Pavlova

I have no idea why I was hesitating for such long time... this is absolutely gorgeous... It exceeded all my expectations :) not only its appearance on the table is wonderful but the taste is just overdelicious! sweet meringue with tropical fruits! this is a real feast for senses ;) I do recommend! :) 
For those afraid of baking a meringue - here is a tip - you can buy a ready-made one in a good bakery ;) And they are probably available in a few sizes - you can make a couple of small pavlovas or one, very big :) all of them will be same delicious :)
Recipe for the meringue comes from this website, the rest is my idea, as Pavlova might be prepared in plenty different ways and will always taste good :)


Note: meringue and lemon curd might be prepared earlier. But - lemon curd must be stored in a closed box, in the fridge.

Ingredients:

Meringue:

  • 4 egg whites from 4 big eggs 
  • 250g of sugar 
  • 1 teaspoon of potato starch 
  • 1 teaspoon of white or rice vinegar 

Lemon curd:

  • 3 eggs 
  • lemon zest and lemon juice from 3 lemons 
  • 100g of powdered sugar 
  • 100g of cool butter 

Whipped cream:

  • 500 ml of 36% cream 
  • 2 tablespoons of powdered sugar 
  • 1-2 packages of powdered whipped cream (to stiffen the whipped cream, or polish smietan-fix*) 

* remember to stick to the proportions while using powdered products. If powder package says it is enough for 200 ml of cream/milk (no difference), and you're using 500ml of cream - add 2 packages.

Top:

  • Tropical fruit (any, tinned or fresh) 
  • peach 
  • mango 
  • passionfruit 
  • lychee 
  • pineapple 
  • guava 
  • ... :) 
  • a handful of shredded coconut, to sprinkle the top 

Preparation:

Meringue:

  1. Preheat the oven to 120C (without convection, just this time) 
  2. Prepare a baking sheet, cover with baking paper. Draw a circle (diameter: for M size eggs - 18 cm, for L size eggs - 20 cm). Put aside. 
  3. Take a mixer and its bowl, put egg whites inside, start beating. After a while, start adding sugar, one tablespoon after another, stiring precisely all the time. The beating should take 10-15 minutes, not less. The meringue after the beating should be stiff and shiny. 
  4. When done, add potato starch and vinegar and beat for another few minutes so that it links. 
  5. Using a spoon or spatula, distribute the meringue on the baking sheet, on the drawn circle. Pull up the sides. (please don't play with it much, just few good moves, because the meringue might be destroyed). 
  6. Put in the oven and bake for 30 min in 120C. After that time, lower the temperature to 100C and bake for another 3 hours. 

Lemon curd:

Lemon curd requires a 'bath' so it is necessary to have a suitable pot and a bowl, that can be put one on another.

  1. Chop the butter into smaller pieces. 
  2. Take a pot, put some water inside, start boiling it. 
  3. Take a bowl that matches the pot, put eggs inside, beat. 
  4. Add lemon juice, lemon zest, powdered sugar and stir till everything links and there are no lumps. 
  5. Now put the bowl on the top of your pot (make sure the bowl stands out from the pot so that you don't get burn) and slowly keep heating up the mixture (don't boil it). 
  6. Keep adding the butter, one piece after another, stiring after adding. 
  7. When all the butter is melted in the mixture, turn off the heat and put the bowl with lemon curd somewhere aside, to let it cool down. 
  8. Then put your lemon curd in the fridge so that it stiffens more. 

Finishing:

  1. Prepare fruit. If fresh - wash, peel (if necessaroy) and chop. Dry them on a paper towel. Put aside for a while. If tinned - half of the job is already done - just chop and dry. 
  2. When the meringue is baked and cooled down, distribute cooled down lemon curd all over the top. 
  3. Now, prepare whipped cream going through the steps below:

    Whipped cream: 
    1. Before preparing the whipped cream make sure your cream is really, really cool (I always put it in the freezer before beating, for around 10-15 minutes). 
    2. Take a mixer and its bowl, put cream inside, start mixing. After a while add powdered sugar and something to stiffen it (powdered whipped cream/smietan-fix). 
    3. Beat for around 10 minutes (depending on the power of a mixer it might take more or less time, keep paying attention not to make butter).

  4. Distribute whipped cream all over the top. 
  5. Just for the sake of safety, dry all the fruit again on a paper towel, before putting them on the meringue with whipped cream (as the juice from fruit may destroy both whipped cream and meringue). Make any pattern you wish out of the fruit. 
  6. Sprinkle with shredded coconut. 
  7. Store in the fridge. 
  8. Bon Appetit! ;)