Showing posts with label cream. Show all posts

Thursday, 7 August 2014

Snickers Cheesecake

When I was little, we had a small shop nearby, where you could have bought a delicious cheesecake called 'snickers'. We used to buy it every weekend and devour it very quickly :) But the shop was closed and the cheesecake disappeared. We couldn't have found it anywhere (well, definitely not same tasty). Now, a good few years later I thought that it would be wonderful to prepare it on my own, especially that I have some snickers fans here. And so I did prepare it, with a little help of KwestiaSmaku.
It is definitely worth trying! I do recommend. Half of it disappeared during the first hour of its existence, hihi :) 


Note:
  • This cheesecake needs to be prepared a day earlier as it needs to stiffen in the fridge.
  • Some ingredients must be in a room temperature.
  • It is good to buy unsalted peanuts - You can control how salty Your cheesecake will be.


Ingredients:

Bottom:
  • 350-400g of cocoa biscuits 
  • 50-100g of melted margarine or butter
  • 2 tablespoons of baking cocoa

Cheesecake (all the ingredients need to be in a room temperature):
  • 1kg of cheesecake
  • 150-200 g of sugar
  • 3 tablespoons of potato flour or powdered vanilla custard (budyn)
  • 5 eggs
  • 125ml 36% cream
  • 3 teaspoons of vanilla extract

Top:
  • 2 tins of fudge
  • 350g of peanuts (unsalted)
  • some salt (3-5 pinches)
  • optionally - few snickers bars cut into small pieces

Preparation:

Bottom:

  1. Crush the biscuits into very small pieces, for example using a blender's cube cutter (biscuits might be crushed into 'sand').
  2. Add cocoa, stir, add melted butter, stir again, precisely. You can check with a spoon or a hand if the biscuits are sticky enough, it can't be dry and powdery.
  3. Take a baking pan, put baking paper all over it, add biscuits, distribute all over the pan and knead with a hand or a tumbler.
Cheesecake:
  1. Start preheating the oven to 175C.
  2. Remember that all the cheesecake ingredients need to be in a room temperature.
  3. Take a mixer and its bowl, put cheese, sugar and flour inside, mix on a low/middle rotation only till the mixture gets smooth (not longer than 2 minutes).
  4. Add eggs, one after another, mixing after each of them for a few seconds.
  5. Add 36% cream and vanilla extract and mix on a low rotation only till it links.
  6. Pour the mixture into previously prepared rectangular pan with biscuits bottom.
  7. Put in the oven and bake for 15 minutes in 175C. After that time, decrease the temperature to 120C and bake for another 1 hour and 30 minutes, till the cheesecake stiffens (it might still be a little jelly-like in the middle, it is okay, it will stiffen in the fridge).
  8. After that time, turn off the oven and cool down the cheesecake in a slightly opened oven.
  9. When cooled down completely, put in the fridge for a few hours (most preferably - for the entire night).
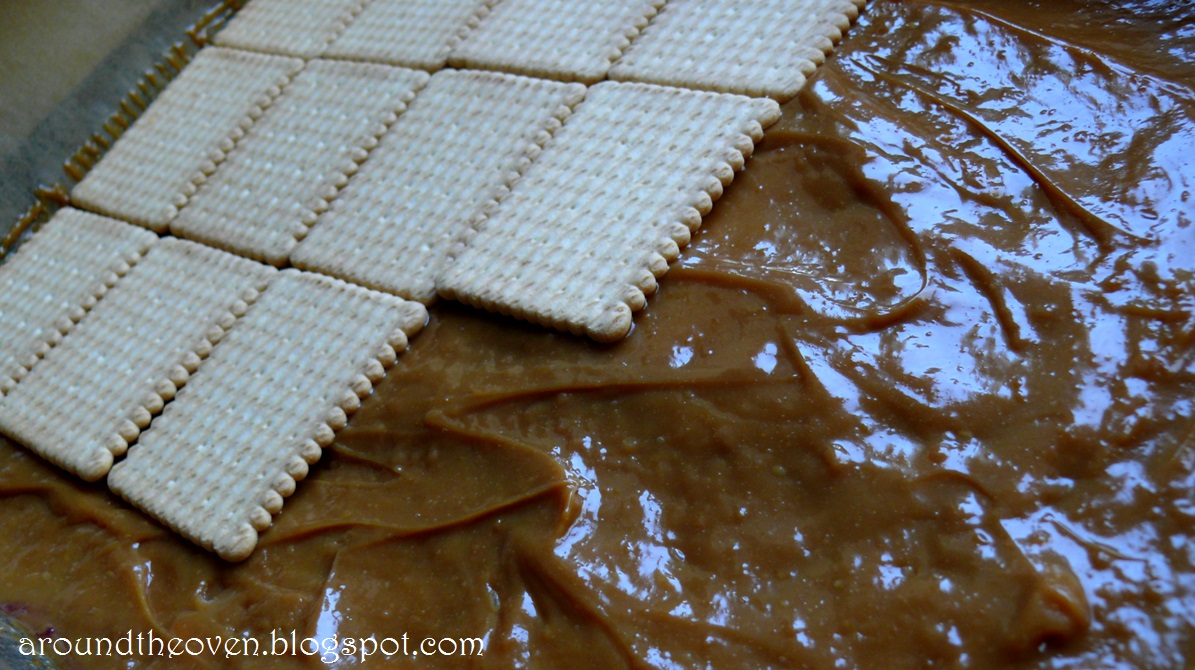
Top:
  1. Take a non-stick pot, pour both tins of fudge inside, turn on a low heat. Stir, adding peanuts. 
  2. Add salt - one pinch, taste, another - as much as you prefer. Note that after a while the taste will slightly change as the salt will completely dissolve and mix with fudge, changing its taste.
  3. Turn off the heat. 
  4. Cool the mixture down a little bit, stiring all the time.
  5. Take the cake out of the fridge, distribute the fudge with peanuts all over the cake.
  6. Store in the fridge.
  7. Bon Appetit :)

Sunday, 6 July 2014

Cherry Cube

Ohh wonderful! Truly chocolate, soft, mouth-watering - and - to my great surprise - it is not heavy and not extremely sweet :) frankly, it is its enormous advantage! 
This cake will wonderfully decorate your table and enrapture your guests. I do recommend.
Recipe, slightly changed, comes from this website.


Ingredients:

Cocoa dough, part 1:

  • 3/4 glass of oil
  • 1/2 glass of water
  • 1 glass of sugar
  • 3 tablespoons of baking cocoa

Cocoa dough, part 2:
  • 5 egg yolks (room temperatured)
  • 5 egg whites(room temperatured)
  • 1/2 glass of white sugar
  • 1,5 glass of flour
  • 1 teaspoon of baking powder
  • 1 teaspoon of baking soda

Cherry cream:
  • 500ml of 36% cream, very cold (before using, put in in the freezer for around 15 minutes)
  • 800g of cherries (fresh or frozen)
  • 2 tablespoons of lemon juice
  • 5 tablespoons of sugar
  • 24g (=6 teaspoons =6 gelatin leaves) of powdered gelatin 

Chocolate frosting (ganache):
  • 125 ml of 36% cream
  • 125g of chocolate (I used 70% cocoa chocolate, but you can use half of milk and half of plain chocolate)

Additional ingredients:
  • Glacé cherries for decoration
  • 1/2 glass of cherry brandy or amaretto
  • whipped cream

Preparation:

Dough:
  1. Put all the ingredients from part 1 in a pot. Start boiling, stir, till all the ingredients link and sugar melts. Turn off the heat and cool down.
While the first part is almost cooled down, time for part 2:
  1. Sieve the flour, baking powder and baking soda. Put aside.
  2. Take a rectangular baking pan (preferably 25x35cm). Put baking paper all over it.
  3. Take a mixer and its bowl, put egg whites inside and start beating (it will take 10 minutes). At the end of that time, gradually start adding sugar.
  4. Add egg yolks and mix, on a low rotation, till smooth.
  5. Add cooled down 'part 1' and stir precisely with a spatula or spoon. 
  6. Pour the dough into previously prepared baking pan.
  7. Bake for 35-45 minutes minutes in 180C. Preferably, as always - check if the cake is ready with a toothpick.
  8. Cool down in an open oven.
While the cake is cooling down, prepare the filling:

Cherry cream:
  1. Take a big pot, put cherries inside (no need to defrost frozen ones), add sugar, lemon juice and bring to boil.
  2. After that time, if there is too much cherry juice in your pot (especially from frozen cherries) take all of it out, so that only cherries remain in a pot.
  3. Take a blender and mix till smooth.
  4. Put gelatin in a glass, cover with hot, boiling water (just a little bit of boiling water, to cover the gelatin is enough) and keep stiring till the gelatin dissolves.
  5. Add to blended cherries and stir precisely. Let it cool down completely.
  6. Take a mixer with its (another ;) ) bowl, put 36% cream inside and beat till stiff (depends on mixer's power it will take between 5-10 minutes).
  7. In 3 parts, start adding cooled down cherry mixture. When done, put in the fridge for a while.

Finishing:

  1. Take a big piece of baking paper. 
  2. If the cake cooled down completely, cut into equal 2 pieces (the best way to do it is to use a thread).
  3. Put the first piece of cake on your baking paper. Lift it, and put it back in the baking pan.
  4. Here is a good time, to take alcohol and with a spoon, distribute it all over the piece of cake.
  5. Cover with cherry filling, put another piece of cake (add alcohol if desired) on it and the remaining part of the filling. 
  6. Put it in the fridge for around 15-20 minutes. During that time, prepare the chocolate frosting.

Ganache:
  1. Chop the chocolate into small pieces. 
  2. Put the cream in a pot, boil. Turn off the heat. Add chocolate and stir till it links and you receive a smooth frosting. Put aside for a while.

  1. Take the cake out from the fridge, distribute the frosting all over the top, and put back in the fridge for at least 20 minutes.
  2. After that time, decorate your cake with glacé cherries, distributing them quite far away from each other, so that you can cut equal cubes. It is also possible to put some whipped cream all over the cake and then, on it, a cherry, like here, in that recipe.
  3. Store in the fridge.
  4. Bon Appetit :)

Sunday, 24 November 2013

W-Z Cake

A very tasty, classic chocolate-cream cake :) Looks very elegant, might play a role of a small birthday cake :) might be prepared both in adults' version (with alcohol) or without. Both mouth-watering! :)
The recipe from the sponge cake comes from this website.
And some other parts from this one and this one.


Ingredients:


Sponge Cake: (it is good for a springform cake tin but for rectangular it is adviced to double these ingredients)

  • 7 eggs
  • 1 glass of sugar
  • 2/3 glass of baking cocoa
  • 2/3 glass of flour

Whipped cream:
  • 1 litre of 36% cream
  • 1/4-1/2 glass of sugar
  • 2-3 teaspoons of gelatin
  • half of the glass of hot water

Chocolate topping:
  • 100g of dark chocolate 
  • 100g of milk chocolate 
  • 50g of butter 
Optional Ingredients:
  • almonds
  • whipped cream
  • nuts
  • cherry liqueur
  • plum/cherry jam
  • around 1kg of cherries (fresh, frozen or from the liqueur)

Preparation:


Sponge cake:

  1. Take a tin. Grease it(entire tin) and put baking paper inside (only on the bottom). Put aside.
  2. Take a small bowl. Mix flour and cocoa inside, very precisely. If needed - sieve.
  3. Start preheating the oven to 170C.
  4. Take a new bowl. Separate egg yolks from egg whites, so that the whites remain in a bowl and whites in a glass (for example).
  5. Stir the yolks precisely and put aside.
  6. Beat the egg whites on a low rotation for 2-3 minutes till the foam appears. Gratually increasing the rotation of the mixer start adding the sugar, one tablespoon after another. Generally, beat the whites for 10 minutes.
  7. Slowly start adding egg yolks (step by step, one needs to link precisely before adding another part of the yolks).
  8. Divide mixed flour and cocoa into 3 parts. Add it to the mixure, step by step, very carefully (not to destroy the foam) stiring with a big spoon very precisely (the flour on the bottom of the bowl tends to remain unmixed/unlinked). 
  9. Pour the cake to previously prepared tin.
  10. Bake for 30-40 minutes (till the toothpick is dry) in 170C.
  11. After that time, take it out from the oven and throw energetically on the kitchen's surface. Cool down.
  12. When cooled down, cut into 2 equal pieces using a knife or for example a thread.
  13. It is advisable to put it back in a tin, if possible.

Optionals:
  1. If desired - take a jam and (optioanlly) mix it with alcohol and cherries. 

Whipped cream:
  1. Make sure the cream is very cold.
  2. Take the glass with hot water, put gelatin inside, stir till it melts. Cool down (it needs to be a liquid after cooling down, if needed - add a little water).
  3. Take a mixer and its bowl. Put the cold cream inside, add sugar, start beating - around 10 minutes. Add cooled down gelatin (make sure it is still a liquid). Mix precisely. 
Chocolate topping:
  1. Take a pot, put butter inside. 
  2. Melt the butter on the lowest heat. 
  3. Add chopped chocolates, heating or not, but stiring all the time, carefully so that it doesn't burn. 
  4. Stir and cool down a little.
Preparing the cake:
  1. Take the first piece, sprinkle with liqueur (optional), put jam(with or without liqueur, but it's still optional) and cherries (optional) on it. Put whipped cream. Add cherries on the top(optional). 
  2. Take the second piece of the cake, sprinkle with liqueur (optional), put jam(with or without liqueur, but it's still optional)on it and put on the first piece of cake.
  3. Pour previously prepared chocolate on the entire top.
  4. Put in a fridge for at least 2-3 hours.
  5. Before serving, it is a good idea to decorate the cake with whipped cream, cherries, almonds etc.
  6. Bon Appetit! :)

Wednesday, 30 October 2013

Caramel Brownie

We had a small family party last week, so I was preparing a big pineapple cake (recipe later ;) ) and simultaneously I was looking for something in totally different, opposite taste to my fresh, fruit, light sponge cake. That's when I found that recipe. Believe me, that's the best brownie I've ever eaten! Cruelly tasty, extremely chocochocolate with light, caramel cream, caramel sauce and crunchy peanuts. 
Precious advice: cut into small pieces. Thanks to that remorses for eating the cake are smaller ;)
I do recommend preparing it! ;)
Recipe comes from Kwestia Smaku


Chocolate cake:
  • 200g of at least 70% dark chocolate
  • 200g of butter
  • 3 eggs
  • 220g of sugar or powdered sugar
  • 120g of flour
Caramel Cream:
  • 67g of butter
  • 1/2 glass of sugar
  • 1/2 glass of water
  • 2 glasses of powdered milk
  • 100g of roasted peanuts
  • 25g of mascarpone cheese
Caramel Sauce:
  • 67g of butter
  • 1/3 glass of sugar
  • 1/2 glass of 36% cream
  • 4 full tablespoons of glucose
Top:
  • 150-200g of roasted peanuts

Preparation:
  1. If you haven't found roasted peanuts, take a frying pan, put some peanuts on it, so that they cover the entire surface,and fry for few minutes till the colour is gold. 
  2. Take the smallest rectangular tin you have, grease and cover with baking paper. I used springform cake tin, as it was my smallest one. And I do recommend using it, it will be very useful at the end, unless you have rectangular with removable sides. Of course it is possible to use bigger tin - but then all the ingredients need to be doubled. 

Brownie cake:

  1. Take a double-bottom pot, put chocolate and butter inside, melt on a very low heat, stiring all the time (keep observing it, it starts burning very quickly! it needs to be a liquid). Put aside to let it cool down. 
  2. Take a mixer and its bowl, put eggs and sugar inside, beat for around 7-10 minutes to get a bright, fluffy foam. 
  3. When the chocolate is cooled down, start pouring it slowly to the beaten eggs, mixing all the time on the slowest mixer's rotation. 
  4. Add flour, mix on the slowest rotation till it links. 
  5. Pour the dough to previously prepared tin and bake for 25 minutes in 170C. 
  6. After 25 minutes, take it out from the oven, cool down, in the tin.

Caramel Cream:

  1. Take a pot, put butter inside, melt. Add sugar. Keep heating, on a low heat, stiring from time to time. Be careful not to burn it. 
  2. When the sugar will start getting gold, add (be careful ! ) water and stir till the sugar melts again. 
  3. Cool down a little and add powdered milk, gradually, stiring after every adding or mixing it. 
  4. Add mascarpone and mix - again, using a blender of mixer (yes, it will be very thick). 
  5. Chop the peanuts and add to the cream. Stir, using a spoon.

Caramel Sauce:
  1. Take a pot, put butter inside, melt. Add sugar. Heat on a very low heat, stiring all the time. 
  2. When the sugar will start getting gold, add (be careful ! ) 36% cream. 
  3. Boil for a while, till the sugar melts again. 
  4. Cool down a little, add glucose, stir, cool down completely.

Preparing the cake:
  1. When the brownie cake is cooled down, take it out from the tin, cut across using a knife or a thread. Gently put one piece aside. 
  2. Put one half of the caramel cream all over the 'bottom piece' of the cake. Put the second piece of the cake on it. 
  3. Put the second half of the caramel creme all over the second piece. 
  4. Now - advisably - put the cake back in a tin. 
  5. Sprinkle with peanuts. 
  6. Pour the caramel sauce all over the top (that's the moment when springform cake tin is perfect - nothing spills out) 
  7. Put in the fridge for at least an hour so that everything stiffens. 
  8. Take the cake out of the fridge, take out the side of the tin (blessed springform cake tin), cut into small pieces. 
  9. Bon Appetit! :)


Tuesday, 30 July 2013

Spicy pasta with chicken

This is my old idea of making a delicious dinner out of simple ingredients! And, what is more important, with that dish, everyone will find something suitable for themselves, for example: 
For children - there is pasta, which, if they are faddy - might be served only with chicken or with butter+sugar. 
For vegetarians: just take away the chicken.
For those on a diet - no mushroom sauce and no cheese.
Perfect!
The recipe is mostly mine, I took the recipe for the sauce from this website.


Ingredients:

  • 500g of chicken breasts, chopped
  • 1 packaging of wholemeal Fusilli pasta
  • 100-200 g of cheese, grated (or some slices to put on the top)
  • 1 onion, chopped
  • pepper, salt, cayenne pepper (be careful with cayenne, it is spicy)
  • parsley - leaves, to sprinkle the top
Mushroom sauce:
  • around 1/2 kg of mushrooms (penny buns)
  • 1 small onion
  • 2 cloves of garlic
  • 50 g of butter
  • 2 tablespoons of olive oil
  • 125 ml of 30-36% cream 
  • pepper, salt
  • 2-3 tablespoons of fresh, chopped parsley
Optional sauce ingredients:
  • 5 tablespoons of beer or white wine


Preparation:

Pasta:
  1. Take a bigger, clean pot, pour water and a pinch of salt inside. Put on a stove, boil on a middle heat. When it reaches 100C, add pasta, stir, change the heat into low. Boil  for 7-12 minutes. Stir from time to time*.
  2. When it's done, put the pasta on a colander and pour cold water on the pasta.**
*It is important, because pasta tends to stick to the bottom of the pot and burn as well as it tends to boil over.
** This is a good way to avoid sticky pasta.

Meat:
  1. Chop into pieces, season with salt and pepper and cayenne.
  2. Take a very big frying pan, grease it a little bit with oil. Turn the heat on.
  3. Put the chopped chicken on the frying pan and fry for 10-15 minutes.
Mushroom sauce:
  1. Clean the penny buns very precisely using a knife or a brush. If necessary - clean them quickly under cold water. Dry on a paper towel. Chop.
  2. Chop the onion and garlic.
  3. Take a frying pan, put 30g of butter and 1 tablespoon of oil on it. Add chopped onion and fry for 5 minutes on a middle heat. Add garlic and fry for another 1-2 minutes on a low heat. It needs to be gold, not burnt.
  4. Add optional ingredients. Boil till water evaporates and a thick substance appears.
  5. Add the rest of the buter and the oil. When it starts frying, add penny buns and fry on a high heat for around 6 minutes, stiring from time to time. 
  6. Take the cream, add 2-3 tablespoons of sauce from the frying pan, stir. Pour everything on the frying pan and boil on midle heat. Season with salt (1-2 pinch(es)). Stir. Boil for around 2 minutes so that the sauce has a chance to get thicker. At the end, add parsley and season with pepper. Stir, turn the heat off.

  1. Take the sauce and pour it on the frying pan with meat. Add pasta, boil for few minutes, stiring. Turn the heat off.
  2. Bon Appetit! :)

Monday, 1 July 2013

Gourmet Sensation

 As the title says.. and without baking :) This is absolutely one of the most delicious cakes I have ever eaten. And, this is an absolute must-do at least once in life :) What is interesting, this cake is so easy, that I could present the entire recipe (and to some extent I will) only by using pictures.


Ingredients:
  • 4 packs of biscuits (butter ones)
  • 2 vanilla 'custards' (a Polish kind of custard, you can find it on the Internet, it is called ' budyn'. If you can't find in your shops anything of that kind, here is a recipe for home-made 'budyn', you'll probably need to double the ingredients to make it suitable for that cake)
  • 2 jars of cherry jam
  • 2 tins of fudge
  • cream 36%: 2 options:
*if powdered:
2 sachets to be prepared with milk (the preparation is written on the sachet, it will be something around 200 ml of milk per sachet)
* if real one, to whip it up: 1 packaging  + 2 tablespoons of powdered sugar + here I do recommend using some kind of powder that can stiffen the cream (in Poland: śmietan-fix, made mainly of glucose and starch)


Preparation:

Briefly, tiers:
  1. biscuits
  2. pudding
  3. biscuits
  4. jam
  5. biscuits
  6. fudge
  7. biscuits
  8. cream
Description:

* every tier will be put on the entire baking sheet surface
  1. Take your baking sheet, grease it and put the baking paper inside (leave some baking paper sticking out of the baking sheet - it will help you getting the cake out of the baking sheet unless you have a sides that you tak take out, then don't)
  2. Put one tier of biscuits on the bottom of your baking sheet (rectangled preffered)

  3. Prepare the custard and pour it on the biscuits  (don't wait till it cools down)


  4. Take a pot, open the tins with fudge, put them in the pot, pour some water to the pot, so that the water covers 3/4 of the tins. Boil on a low heat (keep looking at it, but nothing bad should happen)
  5. Put another tier of biscuits - no need to wait till the pudding is cold
  6. Put the jam on the biscuits


  7. Stir slowly the fudge, check if it is not burning anyhow (it shouldn't)
  8. Put another tier of biscuits
  9. If the water with tins already boils, stir and turn it off. Using a tea towel, take the tin and a spoon, and pour the fudge on the biscuits. Take another tin and do the same.

  10. Put another tier of biscuits.
  11. Prepare whipped cream.


  12. Put the cake in the fridge (for few hours, even entire night)
  13. Keep in the fridge.
  14. Bon Appetit! :)

Thursday, 20 June 2013

Raspberry Frappe


What an extremely hot day, here, in Poland! The real summer is not with us yet, buuut to my great astonishment, we could experience a Sahara conditions today! So how to cool yourself down during such muggy day? A raspberry frappe is the answer - cooling down & waking up miracle. Surprisingly, raspberries matches here. :) But unfortunately strawberries don't (I tried).
The recipe comes from: http://www.mkcafe.pl/przepisy-kawowe/przepisy/malinowe-frappe

Ingredients (for 2 cups):

  • 60-80 g of raspberries
  • 1 teaspoon of sugar
  • 1 square of dark chocolate (optional)
  • 2-4 ice cubes
  • espresso/coffee*
  • 100 ml of 30-36% cream or steamed milk
  • chocolate chips (optional)
* no measure of ml here, because it depends on the height of your glass (it is good to take Irish coffee glass) and on your own taste.

Preparation:

  1. Prepare ice cubes if you don't have any.
  2. Prepare your coffee. Leave it till it cools down
  3. Put raspberries, sugar and chocolate in food processor. Mix till smooth.
  4. Put the puree on the bottom of your glass. Add ice.
  5. Tilt the glass and carefully, pour the coffee slowly on the side of the glass (it is advisable to prepare a coffee in a jug - it is easier to put its spout on the edge of the coffee glass and pour the coffee slowly into the glass) It needs to be done carefully not to mess up the fruit puree bottom.
  6. Put whipped cream or steamed milk on the top. Add chocolate chips on the top if you want to.
  7. Bon appetit :)


Home-made chocolates

A definite gourmet sensation. Easy to prepare, can remain in the fridge for a quite long time.
Can be prepared out of every kind of chocolate, but definitely those made of milk chocolate are the best.
The filling may vary as well. 
I used a lot of silicone forms to prepare them, even ice silicone forms. Surprisingly they seem to be the best - cause they are big enough and vary in shapes :)
The original recipe comes from this website, but I have changed the filling from raspberries to strawberries.


Ingredients: (for 25-30 chocolates - it depends on forms)
  • 150-200 g of raspberries/strawberries
  • 1 tablespoon of sugar
  • 200 g of white chocolate
  • 50 ml of 36% cream
  • 200 g of milk chocolate (good quality preferred)

Optional ingredients:
  • 1 tablespoon of vodka

Preparation:
  1. Take a pot and put inside strawberries/raspberries with sugar. Boil for 2 minutes, then rub it through the sieve, throw away the kernels.
  2. Now it is the right moment for optional ingredients. Add vodka and boil till the excess of water evaporates.
  3. Break white chocolate to smaller parts and add it to raspberry/strawberry puree. Then add also cream. Stir everything till the chocolate melts and everything is smooth. Cool the puree. It should get thicker after cooling.
  4. Prepare your silicone form (here, it needs to be silicone form, because other way, you wouldn't be able to take your chocolates out of the form).
  5. Melt your chocolate - put it in a pot with double bottom and put it on the lowest heat. This is very important - because your chocolate instead of melting may burn and there may be some lumps*. A good idea is to heat the pot and turn off the heat. The chocolate will melt (because of the warmed up pot) and no lumps should appear.
  6. Take a pastry brush, put it in the melted chocolate and apply it to every hole in your silicone form. Do it precisely - spread the chocolate over the entire hole - both bottom and sides. Wait till it dries and put another tier of chocolate.** Wait till it dries.(you can put them in the fridge for 15-30 minutes)
  7. Put something around one teaspoon of the fruit puree into every hole. Do not fill the entire hole till the edge - leave some free space for the last closing tier of chocolate.
  8. Using a pastry brush/a teaspoon put the last tier of chocolate on every small chocolate. Once you put both the puree and the last tier of chocolate - put your chocolates in the fridge for at least an hour.
  9. Carefully take them out of the silicone form (bundle out of the form). These chocolates may remain really for a long time in a room temperature. But keep them in the fridge if there is no need (no guests ;) ) for keeping them on the table.
  10. Bon appetit ! :)

* If there are lumps but the chocolate is not burnt - add one tablespoon of milk (or more if you see after stiring that one is not enough), warm it up and stir.
** the bottom and sides of your chocolates need to have double tier of chocolate not to break while taking them out of the silicone form. This is why it needs to be done precisely and twice.

Tuesday, 18 June 2013

Classical Panna Cotta

Ohh how much I love preparing those little desserts! Perfect with coffee, vanilla-flavoured jelly-like dessert, easy to prepare and without using the oven :) 

Panna Cotta might be prepared in dozen of different flavours(many different extracts might be used instead of vanilla - like almond, coconut, rum, citrus ones...) and in many different shapes(it is up to You what kind of receptacle or form You'll pour it into :) )

Original recipe from this website.

Ingredients: (for 4-7 portions)
  • 3 teaspoons of powdered gelatin
  • 2 teaspoons of vanilla extract
  • 250 ml of 30-36% cream
  • 250 ml of milk (2-3,2% of fat, not less)
  • 80 g of sugar
optional ingredients:
  • 1 tablespoon of rum 
  • 1 tablespoon of white wine
Decoration:
Fresh fruit(for instance: strawberries, raspberries, wild strawberries, cherries), fruit mousse, caramel, chocolate, nuts

Preparation:
  1. Put the gelatin in a tumbler and suffuse it with 2 tablespoons of water. Leave it for 5 minutes.
  2. Take a pot and put the cream, milk, sugar and vanilla extract inside. Stir till the sugar is melted.
  3. Add optional ingredients if you want to.
  4. Boil and take it out quickly from your cooker. Add the gelatin and stir quickly for more or less 1 minute till the gelatin melts completely.
  5. Pour the mixture into cups.
  6. Cool it. Cover with (for example) aluminium foil and put in the fridge for at least 4 hours (entire night advisable)
  • How to take Panna Cotta out of the cup?
To take it out easily you can put the cup for a few seconds in hot water. Then, keep the cup upside down and shake more or less gently till it comes unstuck from the cup's side. Be careful it may fall down!
Another way is just to put the knife inside the cup's edge and cut it inside near to the edges of the cup.