Showing posts with label non-baking. Show all posts

Friday, 28 November 2014

Bajadera Reindeers

Bajadera is always a fantastic, last second idea which always works and always tastes delicious :)
I do recommend them, especially when you have no time and your oven is tired ;) it doesn't require baking ;) I do apologize for the bad quality of the picture, so let me say that the taste and children's smiles will make it up to You :)
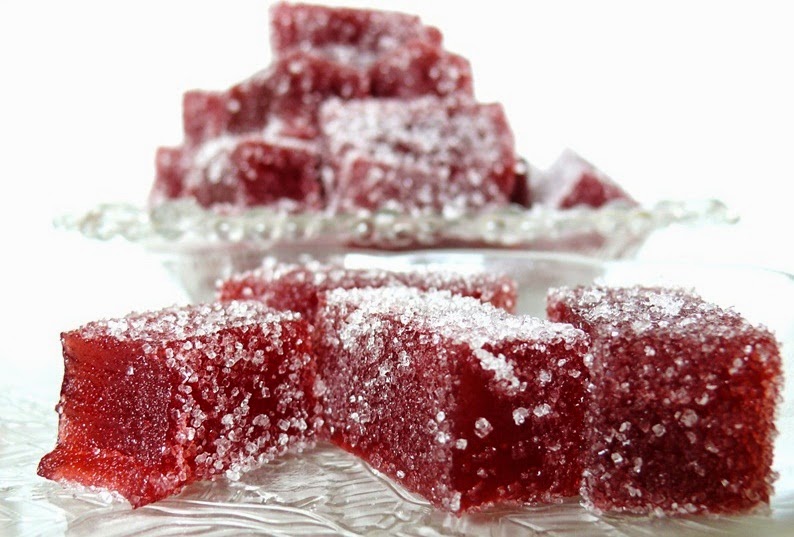
Another wonderful use of bajadera, a little bit easier than reindeers, but also Christmas-themed You can find here.
Quite changed recipe comes from this website.


Ingredients:

Base:
  • 400g of dried pound cake (preferably lemon or vanilla flavoured)
  • 120g of mascarpone cheese
  • 80g of nutella
  • 350g of milk chocolate
  • favourite mincemeat (including for example nuts, almonds; or baking cocoa)
Reindeers:
body parts:
  • nose: 1 pack of red small round sprinkles, 
  • horns: 1 pack of pretzels, cut into halves, 
  • eyes: frosting deco pens
  • some small plastic sticks
  • ribbons for decoration


Optional ingredients:
  • 10-25ml of Rum
  • dried fruit - but in very small pieces

Preparation:
  1. If your pound cake isn't dried enough, it is a good idea to crumble it into very small pieces and put it in the preheated oven(over 180C) for a couple of minutes.
  2. Take a mixer and it's bowl. Put mascarpone cheese and nutella inside. Mix till smooth.
  3. Put dried pound cake to the bowl and mix everything till smooth. 
  4. Here is the time to add and mix optional ingredients if desired.
  5. Cover with foil and cool down in the freezer for 45 minutes.
  6. During that time, prepare a rectangular bakewell pan or loaf tin or - something that you can put in your freezer. Put some baking paper on its bottom (if You have a sponge suitable for making cake pops - use it here).
  7. Take the dough out from the freezer and start making small balls, put each of them in previously prepared pan/tin.
  8. Put back in the freezer for another 15 minutes.
  9. During that time, take a pot, put chocolate (in small pieces) inside and melt on a very low heat.
  10. Dip 1/3-1/2 of every stick in the melted chocolate and put in the middle of every ball.
  11. Put it back in the freezer for another 20-30 minutes.
  12. Prepare a sponge (to dig reindeers in it) and elements of decoration around you.
  13. Take one ball from the freezer, dip in the chocolate, so that it covers the entire ball, take out, wait till the excess of chocolate falls down.
  14. As the ball is very cold, the chocolate will stiffen on it very fast, so as soon as you take it out from the pot, decorate it, starting with horns and dig it in the sponge.
  15. Repeat with all the balls.
  16. At the end, decorate with ribbons.
  17. Store them in the fridge.
  18. Bon Appetit! ;)

Sunday, 23 November 2014

Banana Tart

A very tasty, non-baking recipe for banana lovers :) I did enjoy it a lot :) It is quick, easy and very sweet :) Looks delicious and You can write something or make a nice heart, star, etc- shape on the top :)
The recipe comes from this website, though I made some changes, I skipped lemon juice as it gives a strange taste.


Ingredients:

Bottom:
  • 350g of chocolate/cocoa cookies/biscuits
  • optionally - (if the cookies are cocoa flavoured) - 2 tablespoons of of baking cocoa
  • 100g of butter(melted)

Home-made custard:
  • 60g of potato starch
  • 60g of sugar
  • 5 egg yolks
  • 500ml of milk

Filling&Top:
  • 3-4 bananas, cut into slices
  • 400g of cold 36% cream
  • 1 tablespoon of sugar
  • 1,5 tablespoon of gelatin + 1/4 glass of water
  • optionally: sauces - caramel, chocolate; baking cocoa - to sprinkle the top, shredded chocolate

Preparation:

Bottom:
  1. Prepare a baking pan for a tart, (around 24 cm diameter) - preferably silicone one, as it is much easier to take out the cake from it (unless You own a tart springform).
  2. Crush the cookies in a food processor or blender's cube cutter or any other method - crush them very precisely (sand-like). Add melted butter, mix precisely. Check with your hand if the bottom is sticky enough, if not, add a little bit more butter.
  3. If necessary - add baking cocoa.
  4. Distribute crushed cookies evenly all over the tart pan (bottom + sides) and press a little.
  5. Put in the fridge.
Custard:
  1. Take a pot, put potato starch, sugar and egg yolks inside and mix. Gradually add milk, mixing all the time. Start heating on a low heat till all the ingredients mix/dissolve precisely and you get a smooth mixture. 
  2. Keep heating (bring to boil) and stiring till it thickens (be careful not to burn it, it tends to stick to the bottom of the pot and burn). If there are any lumps - mix with a mixer or blender. Set aside.

Filling&Top:
  1. Put the 36%cream in the freezer.
  2. Wash and peel bananas, cut into slices.
  3. Take the bottom from the fridge and pour the custard evenly all over the bottom. 
  4. Distribute bananas evenly on the custard (one or two layers if necessary). Put it back in the fridge.
  5. Take a pot, put gelatin and water inside, mix. Heat and stir till it melts and set aside. 
  6. Take a mixer and its bowl, start beating the cream with sugar (around 10 minutes). After that time add gelatin and mix precisely.
  7. Take the cake from the fridge, distribute whipped cream evenly on the entire top.
  8. Decorate in a desired way.
  9. Bon Appetit :)

Thursday, 6 November 2014

Stylish Panna Cotta

Ohh how much I love preparing those little desserts! Perfect with coffee, vanilla-flavoured jelly-like dessert, easy to prepare and without using the oven :) It looks elegant on a party table and prepared in a more sophisticated way - it will impress Your guests :)

Panna Cotta might be prepared in dozen of different flavours(many different extracts might be used instead of vanilla - like almond, coconut, rum, citrus ones...) and in many different shapes(it is up to You what kind of receptacle or form You'll pour it into :) )
Original recipe from this website.

I have found all these wonders on Pinterest (click on the link and all the wonders will appear ;) ) and I thought - oh my God, it is so easy and looks so classy and stylish! How is it possible that I haven't thought about it earlier?! :)
So here I'm sharing with You that big secret of preparing those wonderful panna cottas :)


Ingredients: (for 4-7 portions)
  • 3 teaspoons of powdered gelatin
  • 2 teaspoons of vanilla extract
  • 250 ml of 30-36% cream
  • 250 ml of milk (2-3,2% of fat, not less)
  • 80 g of sugar

Optional ingredients:
  • 1 tablespoon of rum 
  • 1 tablespoon of white wine
Decoration:

  • Fresh fruit (for instance: strawberries, raspberries, wild strawberries, cherries), fruit mousse, 
  • caramel, 
  • chocolate, 
  • nuts, 
  • small meringues, 
  • etc. :)

Preparation:

It depends what shape would you like to have. 
  1. If You want jelly on the bottom - it goes first, stiffens completely, then You pour cooled down (! not to melt the jelly) panna cotta mixture and put back in the fridge.
  2. If the jelly is supposed to be the last layer, panna cotta must be completely ready, after a few hours in the fridge and the jelly You pour on it must be cool too, not to melt panna cotta.
  3. If You fancy a slantwise one - first of all, pour the jelly and put the tumbler/etc for instance inside the muffin pan (so that it remains stable, in a-slant position), put in the fridge to let it stiffen completely and after that pour cooled down panna cotta mixture.
  4. There are plenty other variations of preparing panna cottas, You'll find it - mostly with instructions - here :)

General instructions, to make panna cotta:
  1. Put the gelatin in a tumbler and suffuse it with 2 tablespoons of water. Leave it for 5 minutes.
  2. Take a pot and put the cream, milk, sugar and vanilla extract inside. Stir till the sugar is melted.
  3. Add optional ingredients if you want to.
  4. Boil and take it out quickly from your cooker. Add the gelatin and stir quickly for more or less 1 minute till the gelatin melts completely.
  5. Pour the mixture into cups.
  6. Cool it. Cover with (for example) aluminium foil and put in the fridge for at least 4 hours (entire night advisable)

  • How to take Panna Cotta out of the cup?
If You use such nice transparent tumblers, there is no need to take the panna cottas out of them, unless you want to.

To take it out easily you can put the cup for a few seconds in hot water. Then, keep the cup upside down and shake more or less gently till it comes unstuck from the cup's side. Be careful it may fall down!
Another way is just to put the knife inside the cup's edge and cut it inside near to the edges of the cup.


Tuesday, 4 November 2014

Rafaello vol.2

I had some packs of crackers left and I needed a cake, extremely quickly with short preparation time. So I decided to upgrade the basic recipe and here it comes! It is definitely better than the previous one :)

Ingredients: (for a small rectangular pan, otherwise there's not enough cream, but You can double the ingredients and make double cream, then You'll also need more crackers)


  • 1 litre of 3,2% milk
  • 2 vanilla powdered custards, 40g each (or double the recipe for this budyń, recipe here ;) )
  • 2 tablespoons of potato starch
  • 3/4 glass of sugar
  • 2-3 vanilla sugars (16g each)
  • 1-3 tablespoon of Amaretto Syrup
  • 1 egg yolk
  • 250g of margarine
  • 100g of shredded coconut 
  • 2-3(3-5 if bigger pan) packs of crackers (rectangular shape)
  • 330 ml of 36% cream  (or artificial, powdered one)
  • 1/3 glass of powdered sugar

Optional ingredients:
  • almond flakes, for sprinkling the top

Preparation of budyn/custard:

For those of You, who has powdered custard, follow the steps below, if You can't buy powdered budyn/custard then follow all the steps in that recipe, just remember to double all the ingredients.
  1. Take a glass, fill 3/4 of it with milk. Add powdered custard and potato starch. Stir till smooth (no clumps please!)
  2. Take a pot, put all the remaining milk in there, add sugar, start boiling. Stir from time to time to help the sugar dissolve. Bring to boil and add the mixture from the glass. Lower the heat, stir energetically till it turns thick. Cool down.
Now, when the custard is ready: 
  1. Using a stand mixer, mix butter with egg yolk, adding cooled down custard, one tablespoon after another.
  2. Add Amaretto syrup, gradually, mixing and tasting after every tablespoon to check how strong the Amaretto taste is for You.
  3. Add shredded coconut, mix till it links.
  4. Take a rectangular pan - preferably a rectangular springform pan (no baking paper inside is necessary, in both cases).
  5. Put one layer of crackers and start adding some part of the cream, to cover the entire crackers layer.
  6. Put another layer of crackers and cream - repeat till all the ingredients are used, the last layer are crackers.
Now prepare the whipped cream:
  1. Before preparing the whipped cream make sure your cream is really, really cool (I always put it in the freezer before beating, for around 10-15 minutes). 
  2. Take a mixer and its bowl, put cream inside, start mixing. After a while add powdered sugar and something to stiffen it (powdered whipped cream/smietan-fix). 
  3. Beat for around 10 minutes (depending on the power of a mixer it might take more or less time, keep paying attention not to make butter).
  4. Distribute whipped cream all over the top.
  5. Cover the cake with foil, put in the frigde for at least 3 hours.
  6. Bon Appetit! ;)

Friday, 29 August 2014

Raspberry Charlotte Cake

This perfect cake has only perfect advantages :) perfectly literally! :) It is perfect for a gift, it looks gorgeous, tastes wonderfully, it is extremely easy to make and doesn't require using an oven :)
The recipe, slightly changed, comes from this website.


Notes:

  • Prepare this cake at least an evening earlier as it needs to stiffen in the fridge for a good few hours.
  • Please note that You need to use 16cm springform cake pan, unless the cake will be destroyed.
  • Make sure your springform pan is perfectly clean and do not use baking paper, as it will stick to the raspberry foam, get moist and after all, you'd end up with another cake layer, made of baking paper.


Ingredients:

  • 200 g of Savoiardi/ladyfingers (around the cake)
  • red, forest fruit (top)

Raspberry mousse (bottom):

  • 350g of raspberries (fresh or frozen - if so, defrost)
  • lemon juice from 1/2 of lemon
  • 1/3 glass of sugar
  • 2,5 teaspoon of powdered gelatin
  • 200ml of 36% cream, cool
Raspberry cream:
  • 250g of mascarpone cheese, cool 
  • 150ml of 36% cream, cool
  • 3 tablespoons of powdered sugar
  • 1,5 teaspoon of powdered gelatin + 30ml of hot milk
  • 150g of raspberries (fresh or frozen - if so, defrost)

Preparation:

Raspberry mousse:
  • Take a pot, put raspberries, lemon juice and sugar inside. Bring to boil, stiring from time to time.
  • Sieve, to get a mousse without small seeds. 
  • Dissolve gelatin in a small amount (a tiny little bit, just to cover the gelatin) of boiling water, stir so that it melts completely. 
  • Bring the mousse to boil again and add previously prepared gelatin. Stir precisely. Set aside, it needs to cool down completely.
When cooled down:
  1. Prepare a clean springform cake pan and keep it handy.
  2. Beat 36% cream for around 5-7 minutes with a mixer (till the whipped cream is stiff). Stop mixing and slowly, spoon after spoon, add cooled down mousse. Stir gently, till it all links.
  3. Pour the mousse to the springform. Cover for with foil and put in the fridge to let it stiffen for few hours.
When ready, prepare raspberry cream::
  1. Take a small bowl/pot, put 30ml of milk inside, heat till hot. Add 1,5 teaspoon of powdered gelatin and stir till it melts completely. Set aside so that it cools down.
  2. Take another bowl suitable for mixing and put mascarpone, 36% cream and powdered sugar inside. Beat till stiff. Add raspberries and cooled down gelatin(melted in milk). Mix till everything links.
  3. Put on the top of the cake, distribute equally all over. 
  4. Cool down in the fridge for another few hours.
Finishing:
  1. When stiff, take out from the fridge. Using a knife, cut the cake around, very close to the sides of the springform, to make taking it out from the springform easier. 
  2. Take ladyfingers, stick them around the cake (the mousse is sticky, ladyfingers will stick easily).
  3. Take a ribbon, decorate the cake with it, tying it around the cake.
  4. Decorate the top of the cake with (preferably) forest fruit.
  5. Store in the fridge.
  6. Bon Appetit! :)

Monday, 25 August 2014

Advocaat

Wonderful! Best of all :) my favourite :) It isn't really something to drink, it is something to EAT with a teaspoon, as it gets really thick :) It will be as strong as You want it to be - the more vodka You add, the more strong it is. I do recommend! 
I've got the recipe from my lovely cousin, who also shared a recipe for Gourmet Sensation and I am very thankful for that :)
P.S. Please remember that this (and other alcohols) is only for adults and please do not drive after drinking any alcohol.
Cheers! or maybe rather 'Bon Appetit'? :)
Ingredients:
  • 8 egg yolks
  • 1 glass of sugar
  • 1 tin of condensed milk, unsweetened
  • 1 tin of condensed milk, sweetened
  • 1 glass of spirit (this one will definitely be stronger) or vodka

Preparation:
  1. Take a big, high temperature safe bowl, put egg yolks and sugar inside and put that bowl over a pot with boiling water (simply, make so-called 'steam bath'). Start beating the egg yolks with sugar (for around 15 minutes) while the pot with water is still boiling.
  2. When done, finish the bath and add tins with condesed milk to the mixture. Mix till everything links.
  3. Slowly add alcohol, trying if it is good enough for You.
  4. Enjoy, for instance with strawberries :)
  5. Bon Appetit! :)

Sunday, 13 July 2014

Fruit Jellies

Very tasty, fruity, healthy, natural jellies, possible to be prepared from many different fruit, especially, if you have no idea, what to do with them or when they are...way too ripe ;) 
Lack of artificial substances is undoubtedly their biggest advantage.
They might be sprinkled with sugar (though I prefer sugar-free jellies :) ). It is a quick, light and delicious form of confectionery. My little naphew's face and hands are all in strawberry jelly now, so I guess they're tasty, hi hi ;)
Recipe comes from this website.


Ingredients:
  • 30 g of gelatin
  • 1 glass of water
  • 1-2 glasses of sugar (it depends how sweet you want your fruit puree to be)
  • 1 teaspoon of lemon juice
  • 500-600 g of fruit (either frozen or fresh - preferably: strawberries, raspberries, blueberries, currants, cherries)*

* I mixed blueberries with strawberries, which is why they are so dark.


Optional ingredients:
  • sugar or powdered sugar - to sprinkle the jellies

Preparation:
  1. Take a bigger, clean pot and put the fruit inside. Boil for 15 minutes. Grate through the sieve, to seperate puree and kernels. 
  2. Take only 3/4 glass of the mousse** to prepare jellies. Put the glass with mousse aside.
  3. Take another pot, put gelatin inside and pour the water. Wait for 4 minutes. Heat, till all the gelatin melts (stir). Add 1-2 glasses of sugar, boil and  stir till the sugar melts. Add lemon juice. 
  4. Boil for around 10 minutes on a very low heat. Turn off the heat and leave the mixture for 5 minutes. Take away the foam if any appears.
  5. Mix with fruit mousse.
  6. Take a flat form, cover with cling film or foil. Pour the mixture inside. Put it in the fridge for around 12 hours, or till the jelly stiffens.
  7. After that time, take it out of the form and cut it in any shape you like - you can use only a knife to make small squares or cookie cutters to make shapes.
  8. Sprinkle with sugar/powdered sugar - preferably only those you want to eat now.
  9. Jellies can remain (in a closed box) in the fridge for max. 2 weeks. 
  10. Bon appetit! :)

Saturday, 14 June 2014

Rafaello

Finally! :) After few considerations and reading many descriptions about this cake, I finally decided to prepare it :) Prepare - not bake, because it is a non-baking cake! ;) (and I really, really love such cakes - time&energy saving ;) ). I prepared it, mixing all the ideas for this cake I found on the Internet. I must honestly admit that all the people who tried it enjoyed it a lot. To my great surprise, among many (from my point of view) better cakes, this Rafaello was the one that disappeared first. 
And - this is another cake, after greatest-of-them-all Gourmet Sensation and it's brother Gourmet Sensation vol 2. which really gets better with time! (second day, amazing!) 
I do recommend! Easy, not expensive, wonderful cake, both in its appearance and taste :)
Though, surprisingly, this cake might be even better - try the second version of Rafaello here.

Ingredients: (for a small rectangular pan, otherwise there's not enough cream, but You can double the ingredients and make double cream, then You'll also need more crackers)

  • 1 litre of 3,2% milk
  • 2 vanilla powdered custards, 40g each (or double the recipe for this budyń, recipe here ;) )
  • 2 tablespoons of potato starch
  • 3/4 glass of sugar
  • 2-3 vanilla sugars (16g each)
  • 1 teaspoon of vanilla extract
  • 1 egg yolk
  • 250g of butter
  • 200g of shredded coconut (150g for the cream, 50g to sprinkle the top)
  • 2-3(3-5 if bigger pan) packs of crackers (rectangular shape)

Optional ingredients:
  • almond flakes, for sprinkling the top
  • 1/2 glass of vodka or 
  • 1/2-3/4 glass of advocaat (if You wish to add any alcohol, I would recommend this one)

Preparation of budyn/custard:

For those of You, who has powdered custard, follow the steps below, if You can't buy powdered budyn/custard then follow all the steps in that recipe, just remember to double all the ingredients.

  1. Take a glass, fill 3/4 of it with milk. Add powdered custard and potato starch. Stir till smooth (no clumps please!)
  2. Take a pot, put all the remaining milk in there, add sugar, start boiling. Stir from time to time to help the sugar dissolve. Bring to boil and add the mixture from the glass. Lower the heat, stir energetically till it turns thick. Cool down.
Now, when the custard is ready: 
  1. Using a stand mixer, mix butter with egg yolk, adding cooled down custard, one tablespoon after another.
  2. Here is a good time to add alcohol and mix.
  3. Add shredded coconut (leave around 50g for sprinkling the top), mix till it links.
  4. Take a rectangular pan - preferably a rectangular springform pan (no baking paper inside is necessary, in both cases).
  5. Put one layer of crackers and start adding some part of the cream, to cover the entire crackers layer (yes, I realize how hard it is to distribute the cream, You can use many techniques to make it easier - for example: put some lumps and try to link them or distribute the cream through syringe and then smooth it with a spoon)
  6. Put another layer of crackers and cream - repeat till all the ingredients are used, the last layer is cream.
  7. Sprinkle the top with shredded coconut or/and almond flakes.
  8. Cover the cake with foil, put in the frigde for at least 3 hours.
  9. Bon Appetit! ;)

Tuesday, 20 May 2014

Tropical Pavlova

I have no idea why I was hesitating for such long time... this is absolutely gorgeous... It exceeded all my expectations :) not only its appearance on the table is wonderful but the taste is just overdelicious! sweet meringue with tropical fruits! this is a real feast for senses ;) I do recommend! :) 
For those afraid of baking a meringue - here is a tip - you can buy a ready-made one in a good bakery ;) And they are probably available in a few sizes - you can make a couple of small pavlovas or one, very big :) all of them will be same delicious :)
Recipe for the meringue comes from this website, the rest is my idea, as Pavlova might be prepared in plenty different ways and will always taste good :)


Note: meringue and lemon curd might be prepared earlier. But - lemon curd must be stored in a closed box, in the fridge.

Ingredients:

Meringue:

  • 4 egg whites from 4 big eggs 
  • 250g of sugar 
  • 1 teaspoon of potato starch 
  • 1 teaspoon of white or rice vinegar 

Lemon curd:

  • 3 eggs 
  • lemon zest and lemon juice from 3 lemons 
  • 100g of powdered sugar 
  • 100g of cool butter 

Whipped cream:

  • 500 ml of 36% cream 
  • 2 tablespoons of powdered sugar 
  • 1-2 packages of powdered whipped cream (to stiffen the whipped cream, or polish smietan-fix*) 

* remember to stick to the proportions while using powdered products. If powder package says it is enough for 200 ml of cream/milk (no difference), and you're using 500ml of cream - add 2 packages.

Top:

  • Tropical fruit (any, tinned or fresh) 
  • peach 
  • mango 
  • passionfruit 
  • lychee 
  • pineapple 
  • guava 
  • ... :) 
  • a handful of shredded coconut, to sprinkle the top 

Preparation:

Meringue:

  1. Preheat the oven to 120C (without convection, just this time) 
  2. Prepare a baking sheet, cover with baking paper. Draw a circle (diameter: for M size eggs - 18 cm, for L size eggs - 20 cm). Put aside. 
  3. Take a mixer and its bowl, put egg whites inside, start beating. After a while, start adding sugar, one tablespoon after another, stiring precisely all the time. The beating should take 10-15 minutes, not less. The meringue after the beating should be stiff and shiny. 
  4. When done, add potato starch and vinegar and beat for another few minutes so that it links. 
  5. Using a spoon or spatula, distribute the meringue on the baking sheet, on the drawn circle. Pull up the sides. (please don't play with it much, just few good moves, because the meringue might be destroyed). 
  6. Put in the oven and bake for 30 min in 120C. After that time, lower the temperature to 100C and bake for another 3 hours. 

Lemon curd:

Lemon curd requires a 'bath' so it is necessary to have a suitable pot and a bowl, that can be put one on another.

  1. Chop the butter into smaller pieces. 
  2. Take a pot, put some water inside, start boiling it. 
  3. Take a bowl that matches the pot, put eggs inside, beat. 
  4. Add lemon juice, lemon zest, powdered sugar and stir till everything links and there are no lumps. 
  5. Now put the bowl on the top of your pot (make sure the bowl stands out from the pot so that you don't get burn) and slowly keep heating up the mixture (don't boil it). 
  6. Keep adding the butter, one piece after another, stiring after adding. 
  7. When all the butter is melted in the mixture, turn off the heat and put the bowl with lemon curd somewhere aside, to let it cool down. 
  8. Then put your lemon curd in the fridge so that it stiffens more. 

Finishing:

  1. Prepare fruit. If fresh - wash, peel (if necessaroy) and chop. Dry them on a paper towel. Put aside for a while. If tinned - half of the job is already done - just chop and dry. 
  2. When the meringue is baked and cooled down, distribute cooled down lemon curd all over the top. 
  3. Now, prepare whipped cream going through the steps below:

    Whipped cream: 
    1. Before preparing the whipped cream make sure your cream is really, really cool (I always put it in the freezer before beating, for around 10-15 minutes). 
    2. Take a mixer and its bowl, put cream inside, start mixing. After a while add powdered sugar and something to stiffen it (powdered whipped cream/smietan-fix). 
    3. Beat for around 10 minutes (depending on the power of a mixer it might take more or less time, keep paying attention not to make butter).

  4. Distribute whipped cream all over the top. 
  5. Just for the sake of safety, dry all the fruit again on a paper towel, before putting them on the meringue with whipped cream (as the juice from fruit may destroy both whipped cream and meringue). Make any pattern you wish out of the fruit. 
  6. Sprinkle with shredded coconut. 
  7. Store in the fridge. 
  8. Bon Appetit! ;) 

Thursday, 15 May 2014

Monte Coffee

I really enjoy trying new tastes of coffee out! That's why, for example, I never order in a restaurant a coffee that I can prepare on my own at home ;)
So, today, here is a cute and very sweet idea from MK Cafe website :) It contains a well-known dessert/yoghurt for children, that I think everyone loves - ohh yes - Monte :) 
....The real taste and pleasure begins, obviously, when you stir all the coffee layers together... ;)
Mmmmm, I will come back to this recipe very soon, I'm sure!
Bon Appetit, everyone! ;) especially Monte Lovers ;)


Ingredients (for 1 coffee):

  • 1 monte
  • 50-100 ml of milk
  • 100-200 ml of black coffee
  • 50-150ml of milk foam 
  • brown sugar (optional)
 For the top:
  • whipped cream, chocolate (chips), cinnamon, cocoa, caramel, nuts... :)

Preparation:
  1. Take a latte spoon. Using it, take the first, white layer of monte, put it on the left or right bottom side of a latte glass. Do the same with the dark, chocolate part of monte, putting it on the opposite bottom side.
  2. Gently patter the latte glass on the surface, so that monte  won't mix that easily with the milk.
  3. Prepare your favourite coffee (without adding milk).
  4. Add sugar to the coffee if you wish and stir.
  5. Hold the glass, tilt it a little and start adding milk, pouring it slowly down through the glass's side.
  6. Using the same method as with the milk, slowly add the coffee.
  7. Cover with milk foam or whipped cream and additional toppings.
  8. Bon Appetit! ;)

Wednesday, 22 January 2014

Bajadera

Bajadera. What is it? Well - that's a fantastic, last second idea which always works, always tastes delicious as it is chocolate sweet, soft and moist. 
I do recommend, especially when you have no time and your oven is tired as it is a non-baking recipe ;)
But - if You have time and enjoy baking, decorating, creating sweet wonders - see also Bajadera Reindeers.
Quite changed recipe comes from this website.


Ingredients:
  • 400g of dried pound cake (preferably lemon or vanilla flavoured)
  • 120g of mascarpone cheese
  • 80g of nutella
  • 350g of milk chocolate
  • favourite mincemeat (including for example nuts, almonds; or  baking cocoa)
  • some plastic small sticks
  • sprinkles for decoratation

Optional ingredients:
  • 10-25ml of Rum
  • dried fruit - but in very small pieces

Preparation:
  1. If your pound cake isn't dried enough, it is a good idea to crumble it into very small pieces and put it in the preheated oven(over 180C) for a couple of minutes.
  2. Take a mixer and it's bowl. Put mascarpone cheese and nutella inside. Mix till smooth.
  3. Put dried pound cake to the bowl and mix everything till smooth. 
  4. Here is the time to add and mix optional ingredients if desired.
  5. Cover with foil and cool down in the freezer for 45 minutes.
  6. During that time, prepare a rectangular bakewell pan or loaf tin or - something that you can put in your freezer. Put some baking paper on its bottom.
  7. Take the dough out from the freezer and start making small balls, put each of them in previously prepared pan/tin.
  8. Put back in the freezer for another 30 minutes.
  9. During that time prepare small paper muffin cases and sprinkles around you.
  10. Also, take a pot, put chocolate (in small pieces) inside and melt on a very low heat.
  11. Take one ball from the freezer, dip 1/3 of a stick inside a ball and dip in the chocolate, so that it covers the entire ball, take out from the chocolate, wait till the excess of chocolate falls down.
  12. As the ball is very cold, the chocolate will stiffen on it very fast, so as soon as you take it out from the chocolate pot, take out the stick, put it on a muffin case and decorate.
  13. Store finished bajaderas in the fridge.
  14. Bon Appetit! ;)

Tuesday, 17 December 2013

Gourmet Sensation vol. 2

Here is another version of my Gourmet Sensation. Don't try to call it 'worse' or 'poor'! ;) You will have problems to stop devouring it ;) It is same easy and same tasty :) 
And - it gets better with time :)

Ingredients:
*if powdered:
you will need 2 sachets which need to be combined with milk (the method of preparing it is written on the sachet, you will probably need around 200 ml of milk per sachet)
* if real, fresh, liquid one, to whip it up: 1 packaging(around 330 ml, but it is ok to use more)  + 2 tablespoons of powdered sugar + here I do recommend using some kind of powder that can stiffen the cream (in Poland: śmietan-fix, made mainly of glucose and starch)

  • baking cocoa, to sprinkle the top of the cake (or grated chocolate, preferably dark chocolate, because the cake is really sweet itself)

Preparation:

Briefly, tiers:
  1. biscuits
  2. custard/budyń
  3. biscuits
  4. fudge
  5. biscuits
  6. whipped cream
  7. chocolate/cocoa
Preparation:

* every tier will cover the entire surface of the tin.
  1. Take a rectangular springform cake tin.
  2. Put one tier of biscuits on the bottom of your cake tin.
  3. Prepare the custard and pour it on biscuits (don't wait till it cools down).
  4. Take a pot, pour some water inside, start heating.
  5. Open tins with fudge, put them in the pot. Boil on a low heat (keep looking at it, but nothing bad should happen). Stir from time to time.
  6. Put another tier of biscuits - no need to wait till the custard is cold.
  7. Stir the fudge slowly, check if it isn't burning anyhow (though it shouldn't).
  8. If the water with tins already boils, stir the fudge and turn off the heat. Using for instance a tea towel, take the first tin and a spoon, and pour the fudge on the biscuits. Distribute all over the biscuits. Take another tin and reapeat the action.
  9. Put another tier of biscuits.
  10. Put everything in a cold place or in a fridge, so that it cools down completely.
  11. Prepare whipped cream.
  12. When the cake is cooled down, distribute whipped cream all over the top.
  13. Shortly before serving, sprinkle the top with chocolate/cocoa.
  14. Keep in a fridge.
  15. Bon Appetit! :)

Ciasta bez pieczenia