Showing posts with label biscuits. Show all posts

Sunday, 23 November 2014

Banana Tart

A very tasty, non-baking recipe for banana lovers :) I did enjoy it a lot :) It is quick, easy and very sweet :) Looks delicious and You can write something or make a nice heart, star, etc- shape on the top :)
The recipe comes from this website, though I made some changes, I skipped lemon juice as it gives a strange taste.


Ingredients:

Bottom:
  • 350g of chocolate/cocoa cookies/biscuits
  • optionally - (if the cookies are cocoa flavoured) - 2 tablespoons of of baking cocoa
  • 100g of butter(melted)

Home-made custard:
  • 60g of potato starch
  • 60g of sugar
  • 5 egg yolks
  • 500ml of milk

Filling&Top:
  • 3-4 bananas, cut into slices
  • 400g of cold 36% cream
  • 1 tablespoon of sugar
  • 1,5 tablespoon of gelatin + 1/4 glass of water
  • optionally: sauces - caramel, chocolate; baking cocoa - to sprinkle the top, shredded chocolate

Preparation:

Bottom:
  1. Prepare a baking pan for a tart, (around 24 cm diameter) - preferably silicone one, as it is much easier to take out the cake from it (unless You own a tart springform).
  2. Crush the cookies in a food processor or blender's cube cutter or any other method - crush them very precisely (sand-like). Add melted butter, mix precisely. Check with your hand if the bottom is sticky enough, if not, add a little bit more butter.
  3. If necessary - add baking cocoa.
  4. Distribute crushed cookies evenly all over the tart pan (bottom + sides) and press a little.
  5. Put in the fridge.
Custard:
  1. Take a pot, put potato starch, sugar and egg yolks inside and mix. Gradually add milk, mixing all the time. Start heating on a low heat till all the ingredients mix/dissolve precisely and you get a smooth mixture. 
  2. Keep heating (bring to boil) and stiring till it thickens (be careful not to burn it, it tends to stick to the bottom of the pot and burn). If there are any lumps - mix with a mixer or blender. Set aside.

Filling&Top:
  1. Put the 36%cream in the freezer.
  2. Wash and peel bananas, cut into slices.
  3. Take the bottom from the fridge and pour the custard evenly all over the bottom. 
  4. Distribute bananas evenly on the custard (one or two layers if necessary). Put it back in the fridge.
  5. Take a pot, put gelatin and water inside, mix. Heat and stir till it melts and set aside. 
  6. Take a mixer and its bowl, start beating the cream with sugar (around 10 minutes). After that time add gelatin and mix precisely.
  7. Take the cake from the fridge, distribute whipped cream evenly on the entire top.
  8. Decorate in a desired way.
  9. Bon Appetit :)

Thursday, 7 August 2014

Snickers Cheesecake

When I was little, we had a small shop nearby, where you could have bought a delicious cheesecake called 'snickers'. We used to buy it every weekend and devour it very quickly :) But the shop was closed and the cheesecake disappeared. We couldn't have found it anywhere (well, definitely not same tasty). Now, a good few years later I thought that it would be wonderful to prepare it on my own, especially that I have some snickers fans here. And so I did prepare it, with a little help of KwestiaSmaku.
It is definitely worth trying! I do recommend. Half of it disappeared during the first hour of its existence, hihi :) 


Note:
  • This cheesecake needs to be prepared a day earlier as it needs to stiffen in the fridge.
  • Some ingredients must be in a room temperature.
  • It is good to buy unsalted peanuts - You can control how salty Your cheesecake will be.


Ingredients:

Bottom:
  • 350-400g of cocoa biscuits 
  • 50-100g of melted margarine or butter
  • 2 tablespoons of baking cocoa

Cheesecake (all the ingredients need to be in a room temperature):
  • 1kg of cheesecake
  • 150-200 g of sugar
  • 3 tablespoons of potato flour or powdered vanilla custard (budyn)
  • 5 eggs
  • 125ml 36% cream
  • 3 teaspoons of vanilla extract

Top:
  • 2 tins of fudge
  • 350g of peanuts (unsalted)
  • some salt (3-5 pinches)
  • optionally - few snickers bars cut into small pieces

Preparation:

Bottom:

  1. Crush the biscuits into very small pieces, for example using a blender's cube cutter (biscuits might be crushed into 'sand').
  2. Add cocoa, stir, add melted butter, stir again, precisely. You can check with a spoon or a hand if the biscuits are sticky enough, it can't be dry and powdery.
  3. Take a baking pan, put baking paper all over it, add biscuits, distribute all over the pan and knead with a hand or a tumbler.
Cheesecake:
  1. Start preheating the oven to 175C.
  2. Remember that all the cheesecake ingredients need to be in a room temperature.
  3. Take a mixer and its bowl, put cheese, sugar and flour inside, mix on a low/middle rotation only till the mixture gets smooth (not longer than 2 minutes).
  4. Add eggs, one after another, mixing after each of them for a few seconds.
  5. Add 36% cream and vanilla extract and mix on a low rotation only till it links.
  6. Pour the mixture into previously prepared rectangular pan with biscuits bottom.
  7. Put in the oven and bake for 15 minutes in 175C. After that time, decrease the temperature to 120C and bake for another 1 hour and 30 minutes, till the cheesecake stiffens (it might still be a little jelly-like in the middle, it is okay, it will stiffen in the fridge).
  8. After that time, turn off the oven and cool down the cheesecake in a slightly opened oven.
  9. When cooled down completely, put in the fridge for a few hours (most preferably - for the entire night).
Top:
  1. Take a non-stick pot, pour both tins of fudge inside, turn on a low heat. Stir, adding peanuts. 
  2. Add salt - one pinch, taste, another - as much as you prefer. Note that after a while the taste will slightly change as the salt will completely dissolve and mix with fudge, changing its taste.
  3. Turn off the heat. 
  4. Cool the mixture down a little bit, stiring all the time.
  5. Take the cake out of the fridge, distribute the fudge with peanuts all over the cake.
  6. Store in the fridge.
  7. Bon Appetit :)

Tuesday, 17 December 2013

Gourmet Sensation vol. 2

Here is another version of my Gourmet Sensation. Don't try to call it 'worse' or 'poor'! ;) You will have problems to stop devouring it ;) It is same easy and same tasty :) 
And - it gets better with time :)

Ingredients:
*if powdered:
you will need 2 sachets which need to be combined with milk (the method of preparing it is written on the sachet, you will probably need around 200 ml of milk per sachet)
* if real, fresh, liquid one, to whip it up: 1 packaging(around 330 ml, but it is ok to use more)  + 2 tablespoons of powdered sugar + here I do recommend using some kind of powder that can stiffen the cream (in Poland: śmietan-fix, made mainly of glucose and starch)

  • baking cocoa, to sprinkle the top of the cake (or grated chocolate, preferably dark chocolate, because the cake is really sweet itself)

Preparation:

Briefly, tiers:
  1. biscuits
  2. custard/budyń
  3. biscuits
  4. fudge
  5. biscuits
  6. whipped cream
  7. chocolate/cocoa
Preparation:

* every tier will cover the entire surface of the tin.
  1. Take a rectangular springform cake tin.
  2. Put one tier of biscuits on the bottom of your cake tin.
  3. Prepare the custard and pour it on biscuits (don't wait till it cools down).
  4. Take a pot, pour some water inside, start heating.
  5. Open tins with fudge, put them in the pot. Boil on a low heat (keep looking at it, but nothing bad should happen). Stir from time to time.
  6. Put another tier of biscuits - no need to wait till the custard is cold.
  7. Stir the fudge slowly, check if it isn't burning anyhow (though it shouldn't).
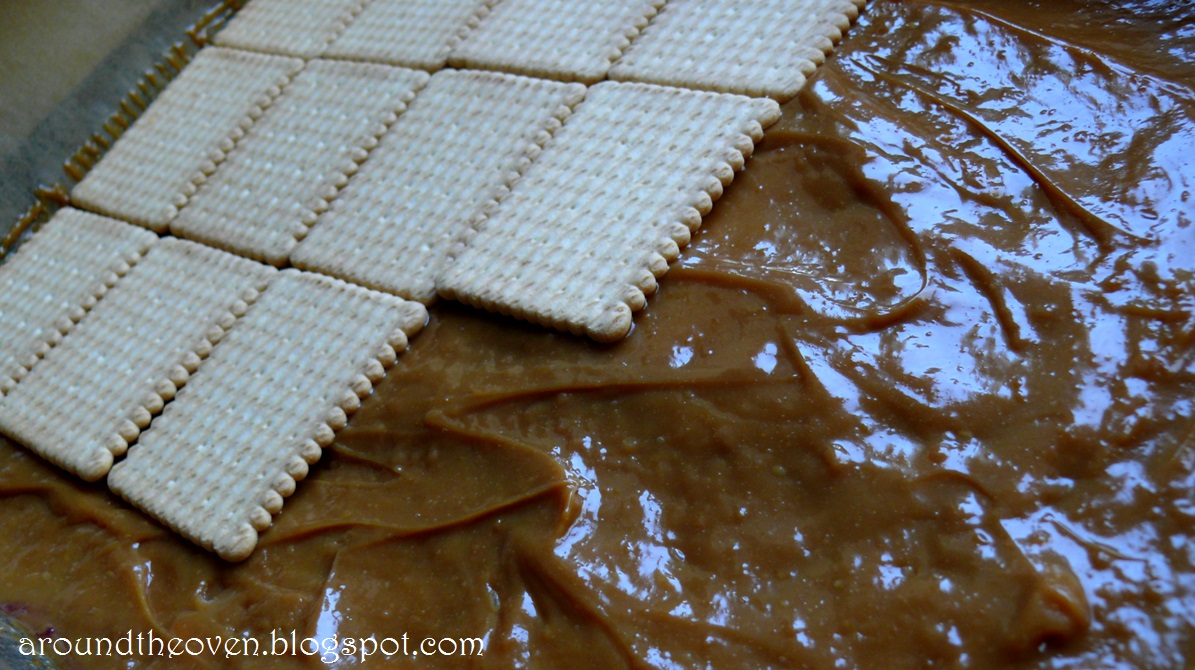
  8. If the water with tins already boils, stir the fudge and turn off the heat. Using for instance a tea towel, take the first tin and a spoon, and pour the fudge on the biscuits. Distribute all over the biscuits. Take another tin and reapeat the action.
  9. Put another tier of biscuits.
  10. Put everything in a cold place or in a fridge, so that it cools down completely.
  11. Prepare whipped cream.
  12. When the cake is cooled down, distribute whipped cream all over the top.
  13. Shortly before serving, sprinkle the top with chocolate/cocoa.
  14. Keep in a fridge.
  15. Bon Appetit! :)

Ciasta bez pieczenia

Monday, 1 July 2013

Gourmet Sensation

 As the title says.. and without baking :) This is absolutely one of the most delicious cakes I have ever eaten. And, this is an absolute must-do at least once in life :) What is interesting, this cake is so easy, that I could present the entire recipe (and to some extent I will) only by using pictures.


Ingredients:
  • 4 packs of biscuits (butter ones)
  • 2 vanilla 'custards' (a Polish kind of custard, you can find it on the Internet, it is called ' budyn'. If you can't find in your shops anything of that kind, here is a recipe for home-made 'budyn', you'll probably need to double the ingredients to make it suitable for that cake)
  • 2 jars of cherry jam
  • 2 tins of fudge
  • cream 36%: 2 options:
*if powdered:
2 sachets to be prepared with milk (the preparation is written on the sachet, it will be something around 200 ml of milk per sachet)
* if real one, to whip it up: 1 packaging  + 2 tablespoons of powdered sugar + here I do recommend using some kind of powder that can stiffen the cream (in Poland: śmietan-fix, made mainly of glucose and starch)


Preparation:

Briefly, tiers:
  1. biscuits
  2. pudding
  3. biscuits
  4. jam
  5. biscuits
  6. fudge
  7. biscuits
  8. cream
Description:

* every tier will be put on the entire baking sheet surface
  1. Take your baking sheet, grease it and put the baking paper inside (leave some baking paper sticking out of the baking sheet - it will help you getting the cake out of the baking sheet unless you have a sides that you tak take out, then don't)
  2. Put one tier of biscuits on the bottom of your baking sheet (rectangled preffered)

  3. Prepare the custard and pour it on the biscuits  (don't wait till it cools down)


  4. Take a pot, open the tins with fudge, put them in the pot, pour some water to the pot, so that the water covers 3/4 of the tins. Boil on a low heat (keep looking at it, but nothing bad should happen)
  5. Put another tier of biscuits - no need to wait till the pudding is cold
  6. Put the jam on the biscuits


  7. Stir slowly the fudge, check if it is not burning anyhow (it shouldn't)
  8. Put another tier of biscuits
  9. If the water with tins already boils, stir and turn it off. Using a tea towel, take the tin and a spoon, and pour the fudge on the biscuits. Take another tin and do the same.

  10. Put another tier of biscuits.
  11. Prepare whipped cream.


  12. Put the cake in the fridge (for few hours, even entire night)
  13. Keep in the fridge.
  14. Bon Appetit! :)